Red or Green Thai Curry Paste

Curry in Pot

To view a revised version of this recipe, please click here.

Hello everyone,

My cousin Sophie was fortunate enough to travel to Thailand (among other countries) for a few months a couple years back. While in Thailand she took a Thai cooking class.

She found that class on trip advisor, and had a blast learning how to make a variety of Thai dishes, including both green and red Thai curries. Sophie told me a bit about the class, and her somewhat flamboyant male instructor yelling in his heavy Thai accent “Harder ladies, HARDER!” at the young girls working the mortar and pestle. Sophie got a kick out of this for sure.

So not that long ago, Sophie came over to my place for dinner. We decided it would be fun to try our hand at a Thai curry. She brought along the most adorable cookbook that she received in her cooking class, complete with lovely photos, questionable translations and cute phrases that just make you happy when you read it. The Thai woman who created the cookbook did a great job, using diagrams to show the ingredients instead of listing measurements.

Now with all of the interesting ingredients needed for the curry, we headed off to T&T to find them. We had fun wandering around the store, in search for such ingredients as lemongrass, galangal, fresh turmeric, ginseng among others.

I learned from Sophie that the only difference between red and green Thai curries is the type of pepper used, green chilies being hotter than red chilies. We opted for the red variety.

The problem with making this curry is that we had to purchase large packages of each ingredient, while the recipe only called for a miniscule amount. Because of this, we decided to quadruple the recipe, and have leftover curry paste to freeze and use at a later date. (I tried using the frozen paste and it worked perfectly!)

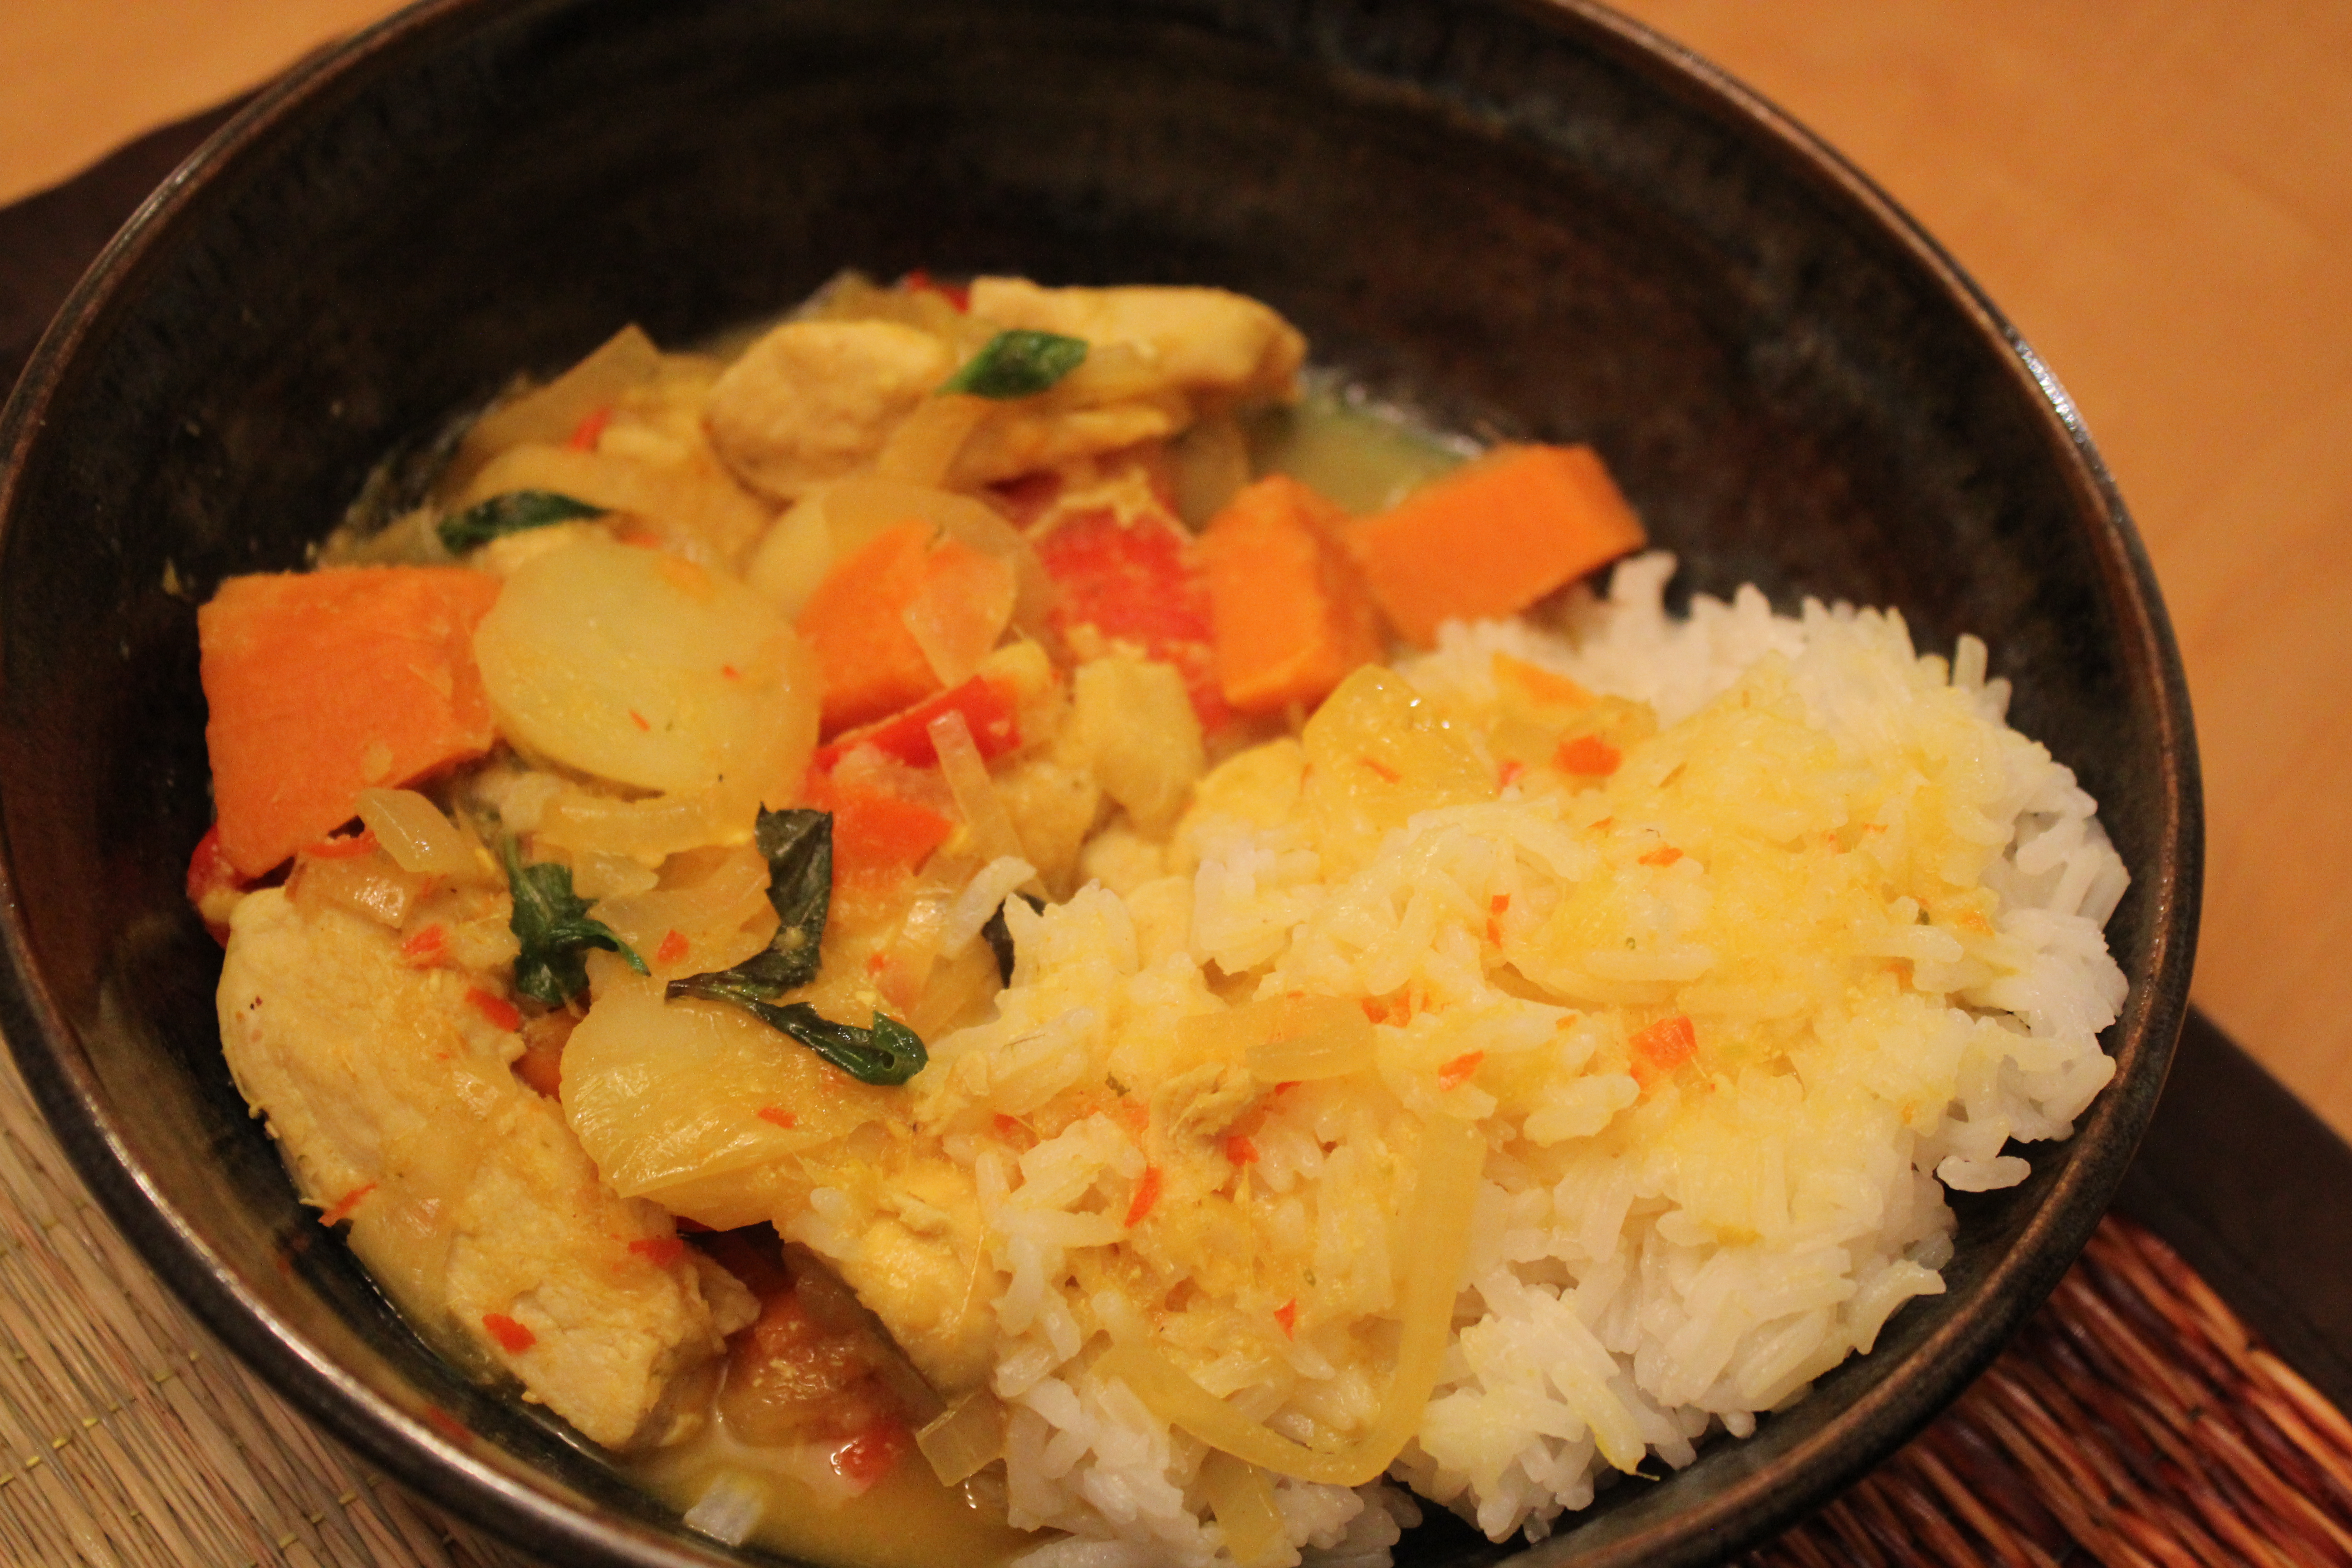
Sophie went ahead and prepared the ingredients for the curry paste, while I chopped vegetables and prepared the chicken. The recipe she had called for eggplant and chicken, but we decided to bolster the vegetable content of our curry, using mushrooms, red peppers, sweet potatoes, and peas alongside the chicken. You can also easily drop the chicken and go vegetarian.

As mentioned before, mortar and pestle is the traditional way to prepare your curry paste. However to save time (and because we quadrupled the recipe) Sophie and I took the easy way out and used the Magic Bullet, a kitchen appliance that I doubt you see often in Thailand.

The thing that really shocked me about this curry was how hot it was! It was the hottest curry I had ever eaten (I think I used a lot of paste.) What shocked me even more was when Sophie told me that our curry was about average hot by Thai standards. WOW!

So if you can’t stand the heat, consider using less chili peppers, removing the seeds, or reducing the amount of paste you add to your curry. I used less frozen paste when I made it a second time, and it was much less hot, heat most people could easily tolerate.

Other than the initial heat shock, our curry was delicious. The use of the fresh ingredients really trumped any curry paste I had ever tried.

Curry Plated

TIPS:

–          Consider reducing the amount of chili peppers you use in your paste, or removing the seeds depending on how hot you want it. Also, control the amount of paste you use.

–          Consider doubling (or more) and freezing the paste for later use – I tried my frozen paste and it worked well

–          Add whatever vegetables you like to bolster your dish

–          Drop the chicken and go vegetarian!

–          Be very careful when handling the fresh turmeric – it stains!

–          Serve with Thai jasmine rice

Ingredient I can’t live without:

COCONUT MILK
I use coconut in so many different curry dishes, Thai and Indian. I always have a can or two in my pantry as you never know when one will be needed.

So the attached recipe is our best interpretation of the diagram in Sophie’s book – we had to improvise but I think Sophie did a good job interpreting the diagram and putting it into numerical quantities. But in the end it doesn’t have to be exact. Sophie and I probably ended up using more turmeric then needed, which is why ours was such a strong yellow colour. Nonetheless, it was delicious!

We had a blast making this dish together, and I am certain we will try another Thai recipe next time!

Bon appetit,

Julie

Click here to view printable Word version of recipe:
Thai Red or Green Curry Paste

____________________________________________________

Thai Red or Green Curry Paste

Curry Paste Ingredients:

1 chunk Gingseng, about the size of your pinky finger
1 stalk Lemongrass
1/2 Kaffir lime or 1/4 zest and juice of regular lime
½ cm thick slice Galangal
2 tsp Coriander Seed
½ cm thick slice Turmeric (also called Kamin)
4 cloves Garlic
1.5 Shallots

Red Curry: 11 small red chilies
Green Curry: 11 small green chilies

Ingredients for Curry Dish:

Chicken (optional) – thighs or breasts, your choice, cut into bite sized pieces
1 can coconut milk
Salt

Any combination of vegetables such as:

Onion
Mushrooms
Red pepper
Frozen Peas
Snow peas
Sweet potatoes
Egg plant
Mini corn

Paste Preparation:

Pre-chop for easy blending

Put all paste ingredients in food processor or blender. Blend to a paste.
Alternatively, you can prepare with a mortar and pestle.

This recipe makes a HOT curry. Use fewer peppers, seeded peppers or less paste for a more mild version of the curry.

If you make leftover paste, portion and freeze for later use.

Curry Directions:

  1. In hot dutch oven or pot, or very large pan cook chicken in oil, until browned, adding salt while cooking. Remove from pot.
  2. Saute onions for a few minutes. Add all other vegetables and saute (apart from frozen peas If you are using them)
  3. Add curry paste and mix in.
  4. Add coconut milk. Then add chicken.
  5. Cover and simmer for about 20 minutes.

John’s Herb Roasted Pheasant and Gravy (or Cornish Hen)

Pheasent in PanHello everyone,

When John was a kid, his dad would take him out bird hunting. With such fond memories of the past, the two of them recently decided to head out again for the first time in over a decade.

You may be familiar with the concept of a stocked lake for trout, where the government grows trout in hatcheries and then deposits them in a designated lake for people to go out and catch. I have been to stocked ponds before, and it’s nice to be able to fish for trout close to home.

What I didn’t realize, is that the same thing is done with pheasants. Outside of Camrose, pheasants farmed all the way out in Ohio are brought over to a designated area of land where local hunters make their rounds.

John and his dad headed out to the hunting area, and had a very successful trip, shooting four pheasants. John got a bullet in all of them, with help from his dad for one or two. However, John tells me that his dad is the king when it comes to bird hunting, including a legendary tale where his dad hit 3 birds with 1 shot – all head shots too! For this trip, he was being a good dad, allowing his son to take the money shots.

We were lucky as John brought two pheasants home to eat!

Pheasants are spectacular birds as far as wild game goes, and I was pleased to get a close up view of all of the colours when John brought them home to clean.

When it comes to bird hunting, head shots are very desirable as it limits the pellets in the body, and thus limits pellets that have to be removed (along with edible meat.) John had hit one square in the head, and we were lucky enough to have pheasant untouched by pellets.

Another nice thing about these pheasants is that they were farmed, making them larger and more tender then their wild counterparts. Usually, the way to go (or so I have been told) is to make a pheasant stew, which tenderizes the meat and conceals the gamey taste. However, because we had such plump and tender pheasants, John and I decided to roast it.

So John went to work, chopping vegetables and seasoning the pheasant with fresh thyme and sage. He roasted the pheasant to glorious perfection, and two of us happily devoured the whole thing in one sitting!

So this week’s recipe is John’s roasted pheasant recipe. If you aren’t fortunate enough to find a pheasant of your own, the recipe would be great with a Cornish hen, about the same size as a pheasant. John also made the most KILLER pheasant gravy that we enjoyed the next day with our fried chicken! I’ve included his gravy directions as well.

TIPS:

–          The nice thing about the pheasant is it cooks much quicker than a then its larger cousin the chicken. Be sure to keep an eye on it – John cooked his for an hour, but you may need more or less time depending on the size of your bird.

–          Go crazy with the herbs – it’s hard to use too much!

–          John provided you his basic gravy recipe, but try adding whatever you like – garlic powder, onion powder, a hint of soy sauce, wine, whatever floats your gravy boat that day!

–          To serve, John and I like to shred the white meat and dip it into the drippings in the bottom of the pan!

Pheasent Hunting IIHerb of the week:

FRESH SAGE
The classic seasoning for any kind of poultry.

So in case you are wondering, the dog in the picture with John and his dad was borrowed from a friend that they ran into while hunting. Although the dog boasted the hunting outfit, turns out the poor thing was completely useless at bird retrieval. Oh well, still makes for a good pic!

Thanks to John for not only going out and getting a pheasant for dinner, but cleaning it, preparing it and cooking it! It’s nice to be spoiled!

Bon appetit,

Julie

Click here to view the printable Word version of recipe:
Herb Roasted Pheasant and Gravy

__________________________________________________

Herb Roasted Pheasant

INGREDIENTS:

1 pheasant (substitute for Cornish hen)
3 shallots, coarsely chopped (or 1 onion)
2 carrots
2 stalks celery
2 potatoes
1 sweet potato
Garlic
Fresh thyme
Fresh sage
Salt and pepper
Grape seed oil (or any oil you choose)

4 slices of bacon (optional)

DIRECTIONS:

  1. Pre-heat oven 400
  2. Chop all vegetables into chunks. Cut garlic cloves in half. Place all vegetables on bottom of roasting pan. Drizzle vegetables with oil and mix.
  3. Chop herbs finely and have them ready.
  4. Wash and oil pheasant.
  5. Place pheasant in the center of roasting pan, ensuring the pheasant touches the bottom of the pan.
  6. Salt and pepper the bird and vegetables.
  7. Rub pheasant with generous amount of sage and thyme. Sprinkle vegetables with remaining herbs.
  8. Place bacon on top of pheasant.
  9. Uncovered, place roasting pan in oven. Cook 15 minutes until bacon is cooked.
  10. Remove bacon from top of bird, and put in with the vegetables.
  11. Cover and roast for an additional 45 minutes, or until bird is done.

Pheasant or Hen Gravy

INGREDIENTS:

Drippings from your roasted pheasant or chicken
Water
Cracked pepper
Vegetta (vegetable bouillon)
Flour

DIRECTIONS:

Put drippings in pot. Add water to thin out fats, until the desired volume of gravy is reached.
Add cracked pepper, and vegetta to taste. Thicken with flour.

To thicken, dissolve flour in water before adding to the gravy.

Deep South Part 4: Natchez, Mississippi and Fried Chicken with Biscuits

Fried Chicken Dinner Plated

Hello everyone,

So this is the final chapter of the culinary tour of the deep south. And there is nothing that screams deep south like fried chicken in Mississippi!

John and I headed to Natchez, a friendly little town on the Mississippi river. Natchez is in both Mississippi and Louisiana depending on what side of the river you are on, but with the downtown on the Mississippi side, that’s where our time was spent.

Natchez is known for its antebellum homes. The town features many museum homes that are open all year round, however twice a year (for the fall and spring pilgrimages) residents of Natchez who are fortunate to live in these large beautiful Greek revival homes open their homes up to the public, where they host tourists as they come through, often in costume.

We did a tour of one of the museum houses, the Rosalie mansion. This 13,000 sq. foot house was used as a headquarters during the civil war (they tried to arrest one of the female owners as a spy – in error of course.)

We booked a bed and breakfast called the Briar, on a beautiful 19 acre property overlooking the Mississippi river. John and I stayed in the main house, and were fortunate enough to be the only people staying there that night, as we really had the whole property to ourselves. We woke up, headed down the stairs to the empty dining room below us, and enjoyed a southern breakfast featuring fresh biscuits, grits, bacon, sausage, eggs and of course a donut to start. John and I could barely finish half each, and apologized to the cook telling her not to be offended that we didn’t finish – we enjoyed the meal immensely, but our poor Canadian stomachs just couldn’t handle that much food!

The highlight of our stay at Natchez had to be our plantation style dinner at the Carriage House, the oldest restaurant in Natchez. I regret to inform you that there were no pictures taken of this meal as we were too preoccupied with devouring it to bother with photographs. The meal featured all of your favourite southern sides: biscuits, mashed potatoes, butter beans and collard greens. There was roast beef that was just great, but the highlight of the meal had to be the fried chicken, the best we had ever had. As you can probably guess, this is what inspired this week’s cooking adventure.

The meal was topped off with the best (and probably most decadent) pecan pie either of us had ever tried!

The evening ended with an uplifting performance from a local gospel group. John and I left the restaurant with our hearts full of spirit and our stomachs full of fried chicken.

So upon returning home, John and I couldn’t wait to try our hand at fried chicken. We opted to do it the traditional pan fried method, soaking the chicken in buttermilk before breading and frying. John took the reins to the chicken as I made mashed potatoes, green beans and fresh biscuits.

We had made a roasted pheasant the night before (stay tuned!) and John took the drippings and made the most outstanding gravy.

The fried chicken was unbelievable, even better then what we had in Natchez!

So for today, we want to share our fried chicken recipe with you. As a bonus, I’ve also included the biscuit recipe I used. This is a quick biscuit recipe, so they won’t be as fluffy as if you let the dough rise, but they are a lot less work. Enjoy them with butter, gravy or your favourite pepper jelly as we did. The recipe comes from our Salt Lick cookbook, the BBQ restaurant we visited in Austin, TX.

Louisiana Hot SauceIngredient I can’t live without:

LOUISIANA STYLE HOT SAUCE

John and I love hot sauce, and have searched all over the USA for our favourite brands. We were fortunate enough to buy some excellent and unique Louisiana hot sauces in New Orleans.

We have come to a hot sauce conclusion – Franks Red Hot is no good! Of course, we don’t all have access up here to these unique brands, but John and I find the way to go is with the classic Louisiana hot sauce brand that you can find in any grocery store. When we were down south, we saw Louisiana hot sauce everywhere (and not one bottle of Frank’s) And those guys know their hot sauce!

Try dipping your fried chicken in Louisiana hot sauce!

So this brings us to the conclusion of the food perspective of our deep south road trip, a fantastic and memorable adventure with stunning landscapes, curious southern culture, and of course awesome food! Just a quick note – John and I were fortunate enough to go bowfishing while in Mississippi. Fishing in the dark with bow and arrows, we were both able to shoot several fish. However, John caught what our guide told us was the biggest fish of the year, and I want to share that picture with you!

Bon appetit,

Julie

Click here to view printable Word Version:
Southern Fried Chicken
Roxy’s Biscuits

Bowfishing

Click here to view Deep South Part 1: Louisiana and Dirty Rice
Click here to view Deep South Part 2: Savannah Georgia and Stewed Okra with Tomatoes
Click here to view Deep South Part 3: Charleston, South Carolina and Grits

___________________________________________________

Southern Fried Chicken

Makes 4 quarter chicken pieces

INGREDIENTS:

Chicken pieces – we like dark meat, drums, thighs, or full leg. Leave skin on

1 cup all-purpose flour
2 tsp salt
1 tsp pepper
1 tsp cayenne pepper
1 and ½ tsp paprika
½ tsp garlic powder
1 tsp poultry season (try season salt, or Cajun seasoning)

Peanut or canola oil

Buttermilk

DIRECTIONS:

  1. Soak chicken in buttermilk for as long as you like.
  2. Rinse buttermilk off chicken, drain and pat dry.
  3. In a bowl, combine dry ingredients
  4. Fill a large pan with oil, (enough so that the oil will be about 1/3 the height of the chicken).
  5. Heat oil on medium high heat, (to 350 degrees if using frying thermometer in pan)
  6. While the oil is heating, dredge the chicken in the seasoned flour and shake to remove excess.
  7. Once oil is hot, place chicken in pan, watching closely to prevent burning. Cover pan with a grease screen while cooking. DO NOT COVER WITH A LID.
  8. Cook chicken until dark golden brown, about 10-15 minutes per side.
  9. Remove chicken, drain on paper towel.
  10. Serve hot with your favourite Louisiana hot sauce. We like the Louisiana Hot Sauce brand.
    _________________________________________________________________Roxy’s Quick Biscuits – The Salt LickINGREDIENTS:

    ¼ cup softened butter
    4 cups sifted flour
    2 tsp baking powder
    1 tsp salt
    2 tbsp sugar
    1 tsp baking soda
    1 pint buttermilk (2 cups)

    DIRECTIONS:

    Preheat butter to 400 degrees
    Cut butter into flour and baking powder
    Stir salt, sugar and baking soda into the buttermilk
    Add mixture to flour. Stir quickly.
    Using 2 large spoons, either scoop dough onto baking sheet and place ½ inch apart.
    Alternatively, roll the dough ½ inch thick, and cut out with a biscuit cutter, or round glass.

    Bake immediately for about 15 minutes, depending on how thick you cut them.

Deep South Part 3: Charleston, South Carolina and Grits

Grits

Hello everyone,

Charleston is a wonderful town to visit. With many of its old buildings still preserved, Charleston is a historical town that was the site of many important civil war events. There are plenty of things to do and see around the city too, including swamp and plantation tours. One can go and visit many of the old mansions, take carriage rides, visit local markets and even do some up-scale shopping downtown. John and I even headed to nearby Foley Beach for some surfing!

But of course, the highlight of Charleston had to be the food! Brace yourself – you’ll be looking at some delicious food for the next few minutes of your life!

In 1989, hurricane Hugo hit Charleston and did considerable damage to the city. Charleston needed a reason to convince investors that the town was worth re-building, and a historical downtown full of restaurants was the key. Today, downtown Charleston is a happening place, with food and restaurants as the centerpiece.

John and I learned this all when we did a culinary tour of Charleston. During this tour we went around town learning about the history of southern cuisine while sampling many of the local favourites: grits, hush puppies, fried green tomatoes, red pepper relish, pulled pork, corn bread, biscuits, collard greens and of course the sweet and wonderful praline. As we went around town, we learned about all of the different culinary influences on southern cuisine, including the British, French and Africans.

Fun fact: We learned that when servants would take the dinner from the kitchen house to the main dining room (typically in separate buildings), they would often be harassed by dogs. To alleviate this problem, they would throw corn bread at the dogs to distract them. Eventually, they deep fried the corn bread and these became “hush puppies.” Kinda funny, eh?

The food didn’t stop at the culinary tour.

John enjoyed a variety of treats on his birthday, including Captain Crunch French toast for breakfast, and crab legs for lunch.

For dinner, we headed to Magnolia’s, a nice restaurant that puts a modern twist on southern cuisine. For appetizers, John enjoyed mussles while I had the boiled peanut hummus. For our entrees, John had Magnolia’s seafood and grits, a dish that they have been serving for over 25 years – I was told by John that this was delicious. I went for the blackened catfish, served with fried green tomatoes with mango chutney and sides of rice and corn. This meal was simply FANTASTIC! One of the best of the trip

Boiled peanuts are a real big thing down south. We purchased them at several road-side vendors and gas stations on our travels Boil raw peanuts in salted water for a couple of hours, and you have a soft and succulent snack. The boiled peanut hummus was a delicious take on this classic.

As one would expect, John and I had been eating barbecue all over the deep south every chance we got, and obviously had to try some BBQ joints in the bustling food scene of Charleston. Bessinger’s has been around for ages, and the Bessinger family boasts an important hand in creating the famous mustard-based barbecue sauce, the pride and joy of South Carolina barbecue. Bessinger’s didn’t disappoint. John and I agreed that this was the best barbecue we had on our trip in the deep south (and we ate at A LOT of barbecue joints!) The meal in the picture was one meal that John and I decided to split. (With one meal served on two plates, this was a good choice.) The pulled pork was good, the ribs were nice and smoky with that pull of the bone quality we enjoy. And Bessinger’s was the first BBQ joint we ate at that didn’t overcook their brisket. YUM!

FYI that ring thing is an onion donut – onion in donut batter deep fried!

So this week’s recipe is very simple, something we fell in love with in the deep south. Well I guess it’s not really a recipe, but I encourage you to make yourself some grits and put your own spin on it! We’re bringing this down south classic up north for you!

During our culinary tour, John and I learned all about ground stone ground corn. Grind once, you have grits, Grind twice you have polenta. Three times for corn meal and four times for corn flour.

John has become the grits expert in our house, and this is how he makes them:

John's GritsGRITS:

1 part grits to 4 parts water (try using ¼ cup of grits and 1 cup water per serving.)

Bring your water to a boil. Add grits gradually to water, while whisking. Turn down heat and continue to whisk until grits are done. Add salt and butter to taste. Add a little milk if you desire too. 

Yes, grits are that simple – so you have no excuse to not try them! Grits aren’t easy to find up north, but we managed to find some at Bulk Barn, so head down there and pick some up for yourself.

Deluxe GritsAlthough John and I prefer our grits the classic way above with just butter and salt, you can fancy them up all you like. Cheesy grits was a dinner or lunch side we ordered at many restaurants down south, with cheese melted on top. You could also try the more deluxe version. Fry up any combination of onions, peppers, mushrooms, bacon, sausage and mix them in your grits! Really, just add whatever you like.

Ingredients I can’t live without:

GRITS
I suppose this isn’t an ingredient, but a meal. John and I enjoyed these at every stop during our road trip, and they are now a staple in our kitchen!

So stay tuned for the final stage of our trip next week (and possibly the most exciting recipe!) as we take you to Mississippi!

Bon appetit,

Julie

Click here to view Deep South Part 1: Louisiana and Dirty Rice
Click here to view Deep South Part 2: Savannah Georgia and Stewed Okra with Tomatoes
C
lick here to view Deep South Part 4: Natchez, Mississippi and Fried Chicken with Biscuits

______________________________________________________________

Grits: 

1 part grits to 4 parts water (try using ¼ cup of grits and 1 cup water per serving.)

Bring your water to a boil. Add grits gradually to water, while whisking. Turn down heat and continue to whisk until grits are done. Add salt and butter to taste. Add a little milk if you desire too. 

Cheesy Grits:

Mix grated cheese, green onions and fried bacon pieces (optional) in with your grits.
Makes a great side dish to any BBQ or southern dinner!

Surfing

Deep South Part 2: Savannah, Georgia and Stewed Okra with Tomatoes

Stewed Okra with Tomatoes Hello everyone,

Savannah, Georgia is haunted. The town boasts to be ‘America’s most haunted city.’ After wandering around historic downtown Savannah, John and I agree with Savannah’s claim. Old buildings everywhere. Giant oak trees with their gnarly stretched out limbs. Cemeteries not used since the 1800’s smack in the middle of downtown Savannah. Yup pretty haunted indeed. I bet Savannah is the only town that offers a “Hearse Ghost Tour” (where you ride around in a hearse) or a “Segway Cemetery Tour.” Sounds kinda fun?

Savannah Honey Co.

Savannah Honey Co.

John and I avoided the ghost tours and spent the afternoon walking around the charming downtown Savannah. The downtown is peppered with little parks all over the place, with plenty of nice restaurants, historical landmarks and shopping. We made our way through the downtown cemetery, had lunch on a lovely little patio overlooking the a square, and hit up the most amazing honey shop on the way home (Savannah Honey Co.) Our favourite was the Tupelo Honey, with pollen harvested from the local Tupelo trees.

John and I were also certain that our bed and breakfast was haunted. There was definitely a ghost hanging out there.

I really wanted to take a southern cooking class on our trip, and John struck gold when he found out about Joe Randall. Tired of running restaurants, Joe is a professional chef who runs creole/Cajun and southern cooking classes out of his house. After watching some YouTube videos of chef Joe Randall online, John and I booked the ‘Creole Feast’ class for the night we knew we would be in Savannah. This is something we were really looking forward to.

We pulled up to a very unassuming gray building. We parked and entered, and were very impressed with the set up that chef had. A well equipped kitchen surrounded by a long table where guests sit and eat. The chef stood at the front at his stove and prep area, with a mirror above him so you could watch him cook from above. John and I thumbed through the recipe booklet we received while we watched chef prepare us a four course meal while giving instructions.

The first two courses featured crab. One was a crab ravigote, and the other fired soft-shell crab served with a Charon sauce (Charon sauce is like a Hollandaise sauce but with tarragon and tomato puree.) The entree was a feast: Andouille sausage, candied yams, beans and rice and stewed okra and tomatoes. Dessert was a bread pudding with a bourbon custard sauce.

The whole meal was amazing. John and I had a wonderful time watching the chef cook, making jokes and of course eating the wonderful meal he served us. We learned a few tips and tricks along the way and even purchased his cookbook. And of course, we left inspired to try our own hand at some of his recipes.

If you happen to be visiting Savannah GA, I highly suggest you take part in Chef Joe Randall’s Cooking school. Click here to view his website.
Full MealLast week, the featured recipe was Cajun dirty rice. In that same meal, John and I also made blacked catfish and stewed okra in tomatoes. Today’s recipe is the stewed okra and tomatoes, and dish we enjoyed in chef Joe Randall’s creole feast.

Okra was brought over from Africa when the slaves came over, and has remained a southern favourite to this day. Okra is the ingredient that achieves the thick texture of gumbo, and the African (or Bannu) word for okra just happens to be “gumbo.” The problem with okra is it has the tendency to be slimy. Apparently if you grow up eating okra, the slime is not a problem, but to people who are not used to eating okra, the slimy texture can be quite offensive. The nice thing about this okra dish is that it is not slimy! I was pretty excited as I have been always looking for a good okra side dish. The recipe is very simple – cut up your okra and simmer in a pot with tomatoes and tomato paste. It’s quick and easy!

Ingredient I can’t live without:

OKRA
After this trip it is a new favourite – in gumbo, fried, breaded and deep fired, and stewed with tomatoes are just a few variations.

So next time you need a side for your Cajun or southern feast, give okra a try! Stay tuned for next week, where John and I explore the glorious southern food scene in Charleston, SC.

Bon appetit,
Julie

Click here to view printable version of recipe: Stewed Okra and Tomatoes

Click here to view Deep South Part 1: Louisiana and Dirty Rice
C
lick here to view Deep South Part 3: Charleston, South Carolina and Grits
C
lick here to view Deep South Part 4: Natchez Mississippi and Fried Chicken with Biscuits

____________________________________________________________
Stewed Okra and Tomatoes
By Chef Joe Randall 

Ingredients:

2 tsp oil
½ cup diced onion
1/3 cup diced green pepper
1 pound okra, cut into ½ inch rounds
1 cup diced tomatoes, keep liquid
1 tbsp tomato paste
6 tbsp water
1 tsp salt
Pepper

Directions:

In a large skillet at medium heat, heat oil and add onion. Sauté for about 5 minutes until onion is tender. Add garlic, okra, tomato paste, tomatoes with liquid and 6 tbsp water. Bring to a boil. Reduce heat, cover and simmer until okra is tender, stiffing occasionally, about 6 minutes. Simmer until most of the liquid is mostly evaporated and mixture is thickened, about 2 more minutes. Serve on its own or over steamed rice. Restaurant Patio

Deep South Part 1: Louisiana and Dirty Rice

Dirty Rice

Hello everyone,

John and I just came back from an epic road trip. Camping in Walmart parking lots in the back of our SUV, we wound our way through the deep south, putting thousands of miles on the odometer as we made our way through 8 different states.

Starting in Louisiana, we headed north to Mississippi then through Alabama, Tennessee, North Carolina, South Carolina, Georgia and finally Florida, taking in as much as we could of everything.

Of course, one fine feature of the south east part of the continent is the cuisine. From Cajun and Creole, to soul food, to everything deep-fried, to fantastic sea food and BBQ a plenty, John and I were on cloud nine as we indulged in a smorgasbord of southern delights.

So over the next few weeks, I am going to take you through our trip, with a food perspective of course!

New Orleans and Louisiana

Our trip started in New Orleans where John and I headed out to the French Quarters to take in the city. Trolleys, Bourbon Street, and music playing everywhere were just a few of the sights and sounds we enjoyed (or in the case of Bourbon Street, smells we DID NOT enjoy.)

Of course, New Orleans is packed with Cajun and Creole food around every corner, and we had our fill. Blackened catfish, crawfish etouffee, gumbo, jambalaya and pralines were just a few of the delicacies New Orleans had to offer.

An interesting thing we learned while down there is the difference between Cajun and Creole cuisine. It comes down ingredients and using what is available. Cajun is traditionally more rural as the Cajuns lived off the land, so they make use of more wild game, and different kinds of fats, using animal fat over butter. Creole is more urban and had access to more ingredients, preferring butter over animal fats and oils.

John and I headed to Café du Monde to try their beignets, deep fried dough topped with an unnecessarily but delightfully large pile of icing sugar. Turns out that the world-famous Café Du Monde doesn’t make the best beignets in town. John and I gave that award to Morning Call, a café located in the main park in New Orleans. Their beignets were just a little better!

Hot Sauce StoreLouisiana is known for its spice blends and hot sauces. John and I have a weakness for such sauces and condiments, and lost all self-control when we went inside some of the fantastic hot sauce stores in New Orleans. Apart from just hot sauces, they boast awesome assortments of BBQ sauces, spice blends, pepper jellies, salsas, ketchups, spreads – with many of them out for sampling! As you can probably guess, John and I brought a lovely assortment home.

Outside of town, we opted for the classic Louisiana swamp tour. We went out on a 6 person airboat. John got his camera so close to the alligator for a shot that the guide was nervous.  I just had to share this picture with you (along with a couple others!)

So this week’s recipe…

Full MealPictured here is a great meal John and I made upon returning from our trip. Inspired by all of the delicious food around us, we made a combo of blackened halibut, dirty rice and tomatoes and okra. This effort reassured us that yes, yes we can cook southern food here in Alberta! John blackened the halibut on his komado, and got the cast iron grill so hot he couldn’t even put oil on there without causing some kind of fire. It was intense, but the final product was delicious! I made the sides, the dirty rice and okra dish.


Rice is a staple side for many dishes you order in New Orleans, and of course isn’t just any regular rice. It usually comes with a side of Cajun dirty rice, or some form of jambalaya. The official definition of dirty rice is rice made with chicken livers, which give the rice the colour. I am not quite that adventurous, so I made my own chicken liver-less version. This recipe makes a great spicy side dish, and is kind of similar to a jambalaya. It features chorizo or Andouille sausage a selection of vegetables, and just a pinch of cayenne pepper.

TIPS:

  • You may need to simmer the rice a bit longer than the usual cook time. Keep an eye on it!
  • Feel free to add more vegetables and meat if you want to beef the dish up a little, and eat it as a meal.
  • The secret is in the sausage, as the spice and fats add a lot of flavour to the rice dish

Ingredient I can’t live without:

CHORIZO SAUSAGE

I always have these on hand in the freezer– great ingredients for spicy soup, paella, jambalaya and of course Cajun dirty rice!

Spice of the week:

CAJUN SEASONING

John and I love Cajun seasoning. Great on potatoes, in eggs, a nice spicy blend, good on so many things. The best use we have found is a rub for steak! (John’s Cajun butter steak is to die for!)

So stay tuned for the next phase of our trip, and the accompanying recipe!

Bon appetit,

Julie

Click here to view recipe:
Cajun Dirty Rice Recipe

Click here to view Deep South Part 2: Savannah, Georgia and Stewed Okra with Tomatoes
C
lick here to view Deep South Part 3: Charleston, South Carolina and Dirty Rice
C
lick here to view Deep South Part 4: Natchez, Mississippi and Fried Chicken with Biscuits

_____________________________________________________________

Cajun Dirty Rice

INGREDIENTS:

½ to 1 chorizo or Andouille sausage, cut into small pieces
½ onion, finely chopped
2 cloves garlic, minced
1 stalk celery, finely chopped
½ green pepper, finely chopped
1 tomato, diced
Pinch of cayenne pepper
Salt and pepper to taste

1 cup brown rice + 2.5 cups water/vegetable broth
or 1 cup white rice + 2 cups water/vegetable broth

DIRECTIONS:

Heat pot and add sausage. Saute and then add onions. Add garlic, celery and green pepper. Then add tomato. Add cayenne.

Add rice and water/broth, salt and pepper.

Bring to a boil. Reduce heat, cover and simmer on medium low for 35-40 minutes (check at 35)

John’s Smoked Salmon Dinner

Close up

Hello everyone,

Once a year, John usually manages to make his way to the west coast for some sort of climbing and/or fishing action. Lucky for me, he usually manages to bring back a nice load of wild fish, caught or purchased, to last us the year and then some. Last year, John and his dad had great success catching bottom feeders (the salmon were few and far between), and John came back with ample amounts of red snapper, lingcod and halibut, great for such dishes as fish tacos and deep fried fish and chips. Click here to see our fish taco recipe, and here to read John’s red snapper with butter wine drizzle.

This year, most of the fish was purchased and John brought back a whole boatload of sockeye salmon as well a bunch of little halibut steaks, which I am very excited for. He even brought a whole tuna (a mini one – which is still pretty big) one that he will have to unfreeze to fillet. Yes, I have a whole tuna sitting in my freezer!

Now getting frozen fish from Vancouver to Edmonton is challenging. One alternative is to fly it back. However, John brought his truck this trip. Anticipating the problem of thawing fish on the 12 hour drive home, John managed to purchase a used little deep freeze for $50.  Judging by the price, you can probably guess that it was in rough condition, so John sanded the inside to clean it out (which I thought was quite clever), and brought it out west in the back of his truck. While in Vancouver, he filled it with fish in and left it at his aunt’s place until he was ready to leave. With the help of Cody, John managed to find a way to plug it in the truck, and 12 hours later, the bounty arrived frozen to our home.

Baby KomadoAlso on his trip, John acquired the newest member of our barbecue family, a mini Komado. This little guy is perfectly portable, and will certainly accompany us on our road trips. As a bonus, he heats up a lot faster than his big brother, full-sized komado. As a result, John can fire him up and have food on the table quicker than before, while using less charcoal and fuel! With just the two of us to feed, this works well as we don’t always need the full-sized komado to fit what John is grilling. While on the trip, Cody bought one too, and I received many photos of them grilling delicious and intricate meals on their matching miniature barbecues while on their climbing trip – boys will be boys!
So of all the ways to cook salmon, John’s classic cedar plank smoked salmon is my favourite. This salmon is very simple, grilled with only olive oil, garlic, parsley, salt and pepper. Nothing fancy. The simple ingredients really let you enjoy the taste of the salmon and the nice smoky maple or alder flavor.

If you don’t have a smoker, relax! This recipe can be done on a regular BBQ. I have to say that the maple smoke does add a lot to the dish, however it is still very nice without the smoke.

Mushroom RiceThe last time we made this salmon, we ate it with a wild mushroom rice pilaf I had purchased from the farmer’s market. The people of ‘Untamed Feast’ forage every mushroom they sell in the wild. I purchased the ‘Chanterelle Arroz,’ a Mediterranean inspired rice dish featuring their alder smoked chanterelle mushroom. The farmer’s market is over, but you can purchase their products at Save-On-Foods. Not cheap but sooo good, the flavourful wild mushrooms will blow your mind!

So John popped the salmon on his new Komado and smoked it to perfection with maple. The final product was mind blowing, some of the best salmon you will ever have. Accompanied with baked asparagus and the chanterelle rice pilaf, this was quite a lovely meal!

TIPS:

  • Unlike other types of smoked salmon, this dish is served warm as a dinner.
  • Be sure to smoke the cedar planks at least 10 minutes before using
  • If you don’t have a smoker, try purchasing a smoker box. They are cheap and easy to find – you can get one at Canadian Tire or Walmart for under $10.
  • The finished salmon will have a texture different then when you cook it for a short period of time at a higher temperature. As opposed to a drier, flakier fish, the fillet will be softer and moister.
  • If you are using a barbecue, be sure that you use indirect heat, lighting only one burner, the one furthest away from your salmon
  • The leftover salmon is great. Thanks to the smoke, I eat mine cold.

So whether you own a smoker, or just a regular barbecue, prepare yourself for some of the best salmon you will ever taste! This is one of my favourites for sure.

Thanks again to John for help with the recipe, and for spoiling me with the best salmon! Below, John has included instructions for both smokers and gas barbecues

Bon appetit,

Julie

Click here to view printable Word version of recipe:
Smoked Salmon Dinner

___________________________________________________________

John’s Smoked Salmon Dinner

This recipe is adapted for any smoker or regular barbecue. John’s preference is the Kamado ceramic smoker.

Ingredients:

Salmon fillet (preferably skin on)
Salt (medium grade or cracked preferred. )
Pepper (cracked preferred)
Oil, butter or both
Crushed garlic
Onions (optional)
Fresh parsley, chopped

1 cedar plank or tin foil if plank unavailable

Preparation:

Soak plank for at least 10 minutes, preferably 20 minutes
For tin foil, place salmon on top of foil, fold edges up to make a tray.

Place fillet skin side down direct on plank or on pre-oiled/buttered foil.

Cover fillet with all ingredients, spread out evenly over fish. Season to taste. Salt is good!

Smoker Directions:

If using smoker, smoke with alder or maple at 220 degrees, for 45 to 1.5 hours, or until salmon looks and feels done. This will vary depending on the size of the fillet.

Please note the salmon will feel softer and moister naturally due to the length of cook, as opposed to a drier flakier fish.

If using a ceramic grill, place salmon directly on diffuser/lava stone.

Gas Barbecue Directions:

Using only one burner furthest away from where the fish will be placed, adjust to get the barbecues internal temperature between 200 – 250 degrees. If you don’t have a thermometer, set temperature on one burner to medium.

Only one burner is on, all other burners are off!

To smoke, use a smoke box. Smoke with alder or maple chips. Place the smoke box between the burner that is on and the grill directly above.

If you don’t have a smoker box, consider purchasing one for less than ten dollars. If not, you will just have non-smoked salmon. Still good!

Cook for 45 minutes – 1.5 hours until done. Cook time will vary with the size of the fillet.

Please note the salmon will feel softer and moister naturally due to the length of cook, as opposed to a drier flakier fish.

Pumpkin Scones

Scone

Hello everyone,

You may or may not know it yet, but pumpkin scones are your favourite food.

Pretty much every person who has tried one of these has freaked out at their deliciousness. Sweet but not too sweet, with the thick and flaky but chewy scone texture, accented with the pumpkin spice combination of cinnamon, ginger, nutmeg, and cloves, these scones are just amazing. The cookie monster really picked the wrong tasty treat to obsess about.

THEY ARE SO GOOD. YOU MUST MAKE THEM! If you don’t, you are missing out on one of life’s fundamental joyous experiences, depriving your heart and soul of this simple happiness. You don’t want that, do you?

The story behind this recipe involves my mom’s friend Nellie. Nellie had been a long time lover of Starbuck’s pumpkin scones, and she found a recipe trying to replicate them online. I think the idea was that there was some kind of contest to replicate the Starbuck’s pumpkin scones, and they picked a winner.  I think the judges failed at picking a winner, because these scones don’t replicate the Starbuck’s version, they beat them by a mile!

A few years back, Nellie and I decided we wanted to try this pumpkin scone recipe. I know how much John likes all things pumpkin spiced so I thought this would be something he would enjoy. Nellie and I were quite ambitious this first time around as we decided to use fresh roasted pumpkin instead of the canned pumpkin. “Fresh roasted pumpkin” you say? “Sounds like a lovely idea” you say?

You are wrong. This was a BAD idea.

Turns out that making roasted pumpkin puree is a lot of work. We started by scooping all the guts out, and cutting it into big chunks. We then roasted batch after batch of pumpkin. After we found that it took way too long and the pumpkin wasn’t even fully roasted, we decided to microwave it to speed things up, just to get the pumpkin soft enough to use. After this, we had to cut all of the flesh off, put it in a food processor and then squeeze excess moisture through a cheesecloth. Pumpkins are big, so this took a lot of time, and the mess was incredible! I think Nellie would agree with how arduous this task was, and that this will not be attempted again.

Despite all the headaches caused by the aforementioned undertaking, I have to admit that the fresh roasted pumpkin puree was delicious. We made the scones and I later made a pumpkin soup that turned out quite nice.

So if you read my earlier buttercup squash post, you will know that I used buttercup squash in a pie. If you want fresh pumpkin puree in a dessert, my recommendation to you would be to substitute buttercup squash. Roast and mash, as simple as that!

Now time for the scones:

The original recipe made about 6 – 9 scones, depending on how big you make them. This is not enough scones. When you make these babies, you are going to be very popular with all the of the members of the opposite sex, and the envy of all of your own gender, so you are going to want a nice haul to share with everyone. I tripled this recipe, and this one makes about 24, give or take based on the size.

The recipe is pretty straightforward as baking goes.

TIPS

–          Once you have made the batter, break it into about 3 pieces. Grab a piece of dough and mold it into a large
rectangle a few inches thick. With a knife, cut the rectangle into multiple triangles. When you are cutting the triangles, keep in mind the dough will expand in the oven, so keep them small for proper portion control. I prefer multiple little scones to a few giants.
–          While they are baking, make your vanilla and spiced glazes.

–          Once the scones have cooled somewhat, apply the glaze. Brush the vanilla glaze on first, and drizzle the spiced glaze on second, in whatever pretty zig-zag squiggly pattern you like.
–          Let them sit out so the glaze hardens. You can let them sit overnight, and they are almost better the next day!

–          These scones freeze wonderfully

Ingredient I can’t live without:

PUMPKIN
An essential fall ingredient for the pumpkin variety of pie, scones, tiramisu, mousse, soup – yes, I have made all of these with pumpkin! I have even had stew baked right inside the pumpkin.

Try substituting buttercup squash for the pumpkin. You will not regret this decision.
Spice of the week:

THE CLASSIC PUMPKIN BLEND: CINNAMON, GINGER, NUTMEG and CLOVES
This wonderful spice blend goes with all things pumpkin. As you might have guessed, I have added them to pumpkin pie, pumpkin scones, pumpkin tiramisu, pumpkin mousse and pumpkin soup! And of course, we all love the seasonal pumpkin spice latte!

So in the end, I was right – John loved these and looks forward to them every time I make them. Special thanks to Nellie for finding this recipe and sharing the experience of making them with me!

So enjoy your new favourite food! These pumpkin scones are a wonderful fall treat that I’m sure you will be making year after year!

Bon appetit,

Julie

Click here to view prinatble Word version of recipe:
Pumpkin Scones

_________________________________________________________________________

Pumpkin Scones

Makes 2 dozen scones

INGREDIENTS:

6 cups flour
1 and ¼ cup sugar
3 tbsp baking powder
1 and ½ tsp salt
1 and ½ tsp ground cinnamon
1 and ½ tsp ground nutmeg
¾ tsp ground cloves
¾ tsp ground ginger

1-14 oz can pumpkin or 1 and ½ cup squash puree
½ cup and 1 tbsp half and half cream
3 large eggs
1 cup + 2 tbsp butter

Vanilla Glaze

1 cup icing sugar
3 tbsp milk
¼ tsp vanilla

Spiced Glaze:

1 cup icing sugar
¼ cup milk
¼ tsp cinnamon
1/8 tsp nutmeg
Pinch of ginger
Pinch of cloves

DIRECTIONS:

– Preheat oven to 425°F.
– Lightly grease or cover with parchment paper baking sheet.

.
Scones:

– Combine flour, sugar, baking powder, salt and spices in a large bowl.
– In a separate bowl, whisk together pumpkin, half and half and egg.
– Using a pastry cutter or 2 knives cut butter into the dry ingredients until mixture resembles cornmeal .
– Add the pumpkin mixture into dry ingredients and mix.
– Turn dough out onto a floured surface and knead until dry crumbs stick together.
– Pat out dough onto a lightly floured surface and form it a long strip. Using a knife, cut triangles out of the strip of dough. Do this a few times with 2 or 3 pieces of dough.

Bake for 13 to 15 minutes on greased baking sheet. Make glazes while scones are baking.

.
Glazes:

Make your two different glazes, combine glaze ingredients and mix with electric mixer.

Once scones have cooled a little, use a brush to cover scones in vanilla glaze. Then, us a spoon to drip spiced glaze on in a zig-zag pattern.

Let sit until glaze solidifies before packing up.

Scones freeze wonderfully.

Nana’s Pickled Carrots

4 Types

Hello everyone,

So how did our ancestors survive bitter cold Alberta winters without getting scurvy from malnourishment? Answer: pickling! Not that I would recommend that you get all of your required daily vegetable intake from pickles every time winter hits, but most of us can agree that the salty vegetable snack is always a nice treat, especially served with some fancy meats, cheeses and olives.

When the harvest hits in the late summer and early fall, there are too many vegetables to eat. A great and tasty way to keep them from spoiling is to pickle them.

So this year, Jackie and I decided that we would embark on an ambitious pickling adventure. I had only pickled once in my life, and Jackie had never done it before at all, so we both had a lot to learn as we went.

Nana's Braided Garlic

Nana’s Braided Garlic

For my part, I relied heavily on my nana for tips. My nana pickled and cans everything, from salsa and pizza sauce to jam, and vegetables to relish. I have been eating her tasty pickled carrots as long as I can remember, and they are my favourite to this day. For our pickling, my nana gladly provided me with her pickled carrot and pickled beet recipes, as well as tons of other tips on sanitation and the process that made our pickling day possible. She also gave us a whole bunch of garlic to use, right out of her garden. You can see how she braided it in the picture, she says this helps it keep a little longer. I just think it looks really beautiful!

Jackie’s number one source of info was her mom. Coming from a Polish family, Jackie has always enjoyed her mom’s spicy European style pickles. Jackie’s mom was a great help providing us with ingredients, directions, and support, answering our dozens of questions.

So equipped with jars, a 4L bottle of vinegar, a ton of pickling salt,  as well as various ingredients and vegetables from the farmer’s market, we got started.

We made four different types of pickles. They are as follows:

Pickled Beets:

I love pickled beets, so making these was a must for me. They are a little more work as they had to be boiled and peeled in advance. Additionally, we had to use the canner for these ones. We got the recipe from my nana, who got it from her older sister Rose, so it is being passed down!

Pickled Asparagus and Beans

This one was a bit of a wild card for us. We combined beans, asparagus and red peppers and attempted to make a zesty vinegar brine featuring turmeric. We used the canner for them as the internet seemed to suggest this. It turns out that because vegetables have varying levels of acidity, some need to be put in the canner while others don’t.

European Pickled Cucumbers

For the cucumbers, we followed Jackie’s mom’s method which involves a fermentation process instead of a vinegar brine. We added garlic, dill seed and chunks of fresh horseradish from Jackie’s mom’s garden. With these, you have to leave them out for about 2 weeks so they can ferment, and then put them in the fridge or a cold room to stop the fermentation process. Mine are still out, and I will have to move them to the fridge in a few days.

Pickled Carrots (Our Recipe!)

My nana’s classic, these are pretty straightforward. And the good news is, they don’t need to be put in the canner. Peel your carrots and add put them in the jar with garlic and dill. Pour your hot brine in the jar and put the cap on. As the jars cool they will seal.

So 5 hours, 28 jars and 4 varieties of pickles later, we boasted quite the yield!


TIPS:

  • It is very important to properly sanitize your jars. I added a pretty detailed sanitization process on the recipe document, so make sure you be careful and follow them. It was all advice from my nana.
  • You might want to consider getting a pickling kit (we got ours from Canadian Tire) This includes a wide funnel, jar tongs for the canner and a magnet to pick up hot metal lids that have been soaking in boiling water.
  • Let your jars sit overnight while they cool before moving them, so you don’t disturb the sealing process.
  • Some jars will seal quickly and others take some time. If there are some jars that aren’t sealed by the time they are cool the next day, put those pickles in the fridge and eat them first. They will be pickled in a few days, depending on the size of the carrots used.

Ingredient I can’t live without:

FRESH HORSERADISH
Ok well I have been living without this one until just a few weeks ago, and I have yet to try the pickles. But I find this a very curious ingredient and will have to learn more about it.

Spice/herb of the week:

FRESH DILL
A key ingredient in so much pickling.

Special thanks to my nana and Jackie’s mom for all their help. A hard afternoon’s work was worth it, as now Jackie and I have a year’s worth of pickles!

Bon appetit,

Julie

Click here to view printable Word version of recipe:
Nana’s Pickled Carrots

______________________________________________________

Nana’s Pickled Carrots

Makes 7 – 8 one quart jars
You will need:

Jars
Metal ring
Tops with rubber rings – these you will have to use new

Suggested:

Buy a pickling kit that contains wide funnel, magnet for caps, tongs for using canner.
Brine:
12 cups water
4 cups vinegar
1 cup sugar
½ cup pickling salt

VERY IMPORTANT TO USE PICKLING SALT! Other salt might cause vegetables to spoil.

In jar add:
Peeled carrots
Garlic
Dill

To sanitize jars:

Put them in the dishwasher. Rinse after removing from dishwasher to remove any residue agent from dishwasher.

Right before pickling, spoon boiling water in jars, at least half full. Cover with towel and  let sit for about 5 minutes before emptying.

Soak the cap (not the ring) in boiling water right before use. This sterilizes and softens the rubber so it seals better.
To pickle:

Fill jars with peeled carrots, cloves of garlic and fresh dill.

Bring brine to a boil, pour over carrots in the jars. Wipe the jars and then on the tops followed by the rings. Wiping will remove any salt or brine from the edge of the jar. Tighten rings but not too tight.

Jars will snap when sealed. Let jars stand overnight to cool before moving. If you move too soon you can loosen the seal.

If a jar doesn’t seal, use that jar first. Put in the fridge and they will be ready to eat in a few days time. Smaller vegetables pickle quickly.

Fall Harvest: Buttercup Squash Pie and Buttercup Squash Soup

Squashes

Hello everyone,

So bad news everyone. This will be my last garden edition for a long time. Thanks to an early frost in Edmonton this year, I am mourning the loss of my pride and joy, my precious and gigantic buttercup squash plant.

This wonderful plant snaked it’s way through my yard and into my heart, reaching it’s long vines far beyond the bed of my garden. The squashes were plentiful too, and I was able to harvest a whole bunch, of all different sizes before my new arch nemesis ie. frost came along to destroy what was dearest to me. Upon it’s demise, my squash plant bore a whole bunch of baby squashes that never had the chance to reach their full and delicious potential. The tears. The tragedy.

I had one vine start to climb a fence, and had a squash grow right into the fence! You can see the odd looking squash pictured here, boasting a flat bottom and a strange indentation.
Fence SquashSo to celebrate the life of my squash plant, today I have not one, but two buttercup squash recipes for you!

First, where do you get a buttercup squash? Well, John and I had never heard of them before, but we looked at the grocery store, and we surprised to see that they had them there. But of course, for all these recipes, I used the ones out of my garden!

Recipe 1: Buttercup Squash Soup

The first recipe we will explore is a savory buttercup squash soup. This recipe is startling easy. Bake squash and onion. Combine squash, onion, celery, chicken broth and sage in pot. Simmer. Blend. Ta-da, squash soup!

This soup is so savoury, warm and bright, and it will fill up your soul on a cold day. I plan to use my funny looking fence squash to make another soup in the very near future.

TIPS:

  • Try using a hand blender directly in the pot instead of pouring the soup into a regular blender.
  • Keep a close eye on the squash while baking it, ensuring that you mix it once or twice while baking – otherwise it will stick to the pan!

Buttercup Squash SoupRecipe 2: Buttercup Squash Pie

The second recipe was inspired by John. When John and I realized that we were about to be blessed with a passel of buttercup squashes, John did some quick research to find out what to do with them. Now pumpkin pie happens to be John’s favourite pie, and he was quite delighted when he discovered that buttercup squash can be made into a pie! According to John’s research, the pumpkin that you buy canned in stores is often buttercup squash. Who knew?

So with this good news, John started to not-so-subtly urge me to make him a buttercup squash pie. Making pie from scratch is usually a lot of work, so I decided to put off this task. But I finally broke down and decided to oblige his request.

When doing some research to find out how to make this pie, I was shocked at how easy it is. Making a pumpkin pie is already pretty easy, and pretty much all you have to do Is substitute pumpkin with the same amount of buttercup squash puree.

To make the puree, you bake the squash in two halves and then just scoop it out and mash it. Combine squash mash with all other pie ingredients in pie crust and bake. Done.

We were so happy with the result, and you could really taste the flavour of the fresh squash in the pie. The next thing I want to try is a butternut squash pie, as my understanding is that it will produce a similar result!

TIPS:

  • Try substituting buttercup squash in your favourite pumpkin pie recipe
  • Mash the squash instead of blending or food processor, as the chunkier texture is really noticeable and nice in the pie
  • I chose to make a homemade pie crust with Tenderflake, but a store bought crust is much easier and pretty good too
  • Serve with homemade whipped cream!

Buttercup Squash Pie SliceIngredient I can’t live without:

BUTTERCUP SQUASH
I only discovered it this year, but it is my new favourite squash. I love it in soups, pies or baked in the oven with a little butter and a sprinkling of brown sugar.

Spice/Herb of the week:

CLOVES
A key spice in pumpkin and buttercup squash pie and so many of those wonderful fall treats.

So for your thanksgiving dinner this year, why not change it up and try a pie from a fresh squash – buttercup or butternut – to dazzle your whole family?

Bon appetit,

Julie

Click here to view printable Word version of recipes:
Buttercup squash Pie
Buttercup Squash Soup

________________________________________________________________

Buttercup Squash Pie

Recipe yields one deep dish pie.
INGREDIENTS:

1 large or 2 small buttercup squash (about 4 pounds total), halved and seeded
Melted butter
1/2 cup brown sugar
3 eggs
1 1/2 cups whipping cream, or light cream
1 1/2 tsp ground cinnamon
1/4 tsp ground cloves
1/4 tsp ground allspice
1/4 tsp ground ginger
1/8 tsp ground nutmeg
1/2 tsp salt
1 pie crust homemade or store bought.

DIRECTIONS:

Pre-heat oven to 400 degrees.

Cut squash in half, and remove seeds. Brush squash with melted butter and place face-down on baking sheet. Bake for 30 minutes, and the flip squash cut sides up and bake for 10 more minutes, or until squash skin can easily be poked by a fork.

Remove the squash from the oven and set it aside to cool.

When squash is cool enough to handle, scoop flesh from squash into a large bowl. Mash with a potato masher. It is okay to leave some small chunks in there. You need 2 cups of squash but if you have a little more that is good.

Beat in the sugar, eggs, and cream. Add the spices and salt. Pour the filling into the crust and transfer the pie to the oven.

Bake the pie for 50 to 60 minutes. Let the pie cool before serving.

Serve with homemade whipping cream!

________________________________________________________________

Buttercup Squash Soup

Serves 4

INGREDIENTS:
1 buttercup squash, about 2 pounds
1 large onion, coarsely chopped
Salt and pepper
2 Tbsp olive oil
1 Tbsp butter
2 ribs celery, chopped
2 tbsp chopped fresh sage, or 1 tsp dried
4 cups chicken or vegetable broth broth
Salt and pepper, to taste

Parmesan cheese to garnish

DIRECTIONS

Heat oven to 375°. Peel the squash with a vegetable peeler, and remove seeds. Cut halves into 1 inch chunks. Toss with chopped onion, olive oil and salt and pepper. Bake for 30 minutes until tender. Be sure to mix vegetables while baking to prevent them from sticking to pan.

Heat butter in your soup pot, and saute celery until tender. Stir in roasted vegetables and sage. Add broth. Bring to a boil, reduce heat and simmer for 30 minutes.

Blend soup. Try using a hand blender directly in the pot.

Baked Squash

Baked Squash