Garden with the Grandmas and Quick Tomato Recipes

Tomato with Boccaccini

Hello everyone,

Both of my Grandma’s love gardening. They both have gardens that take up the better part of their backyards, and flourish and produce beyond belief every year.

Both of my grandmas share a love of gardening, but both take very different approaches to gardening. Always on the go, my Grandma (my mom’s mom, pictured on the left) is always searching for new ideas and gardening techniques. She is always reading gardening books and never hesitates to experiment with new ideas. She talks about soilless gardening, square-foot gardening and any other new techniques coming that she learns about. My grandma always has the loveliest flowers you will see in her rock garden and in pots around her house. Grandma is the one who will spontaneously drop by with gardening equipment, from pink tomatoe baskets, to organic fertilizer and buckets and buckets of compost from the university farm.

My Nana (my dad’s mom pictured on the right) takes a more traditional approach to gardening. Everything that she knows is from years of practice and patience. As a result, all of her tried and true techniques are down to a science. While my grandma is the flower expert, my nana knows vegetables like no one else, and is full of great gardening tips. I am excited as this year she is giving me her ruby red rhubarb plant, a sweeter dwarf breed. I was at her house the other day, and she gave me buckets of dried garlic and onions to plant in my garden, along with instructions about how the garlic cycle works. She knows all the little details that only years of experience can teach you.

So how happy was I when both of my grandmas came over to see my garden? Well pretty happy indeed!

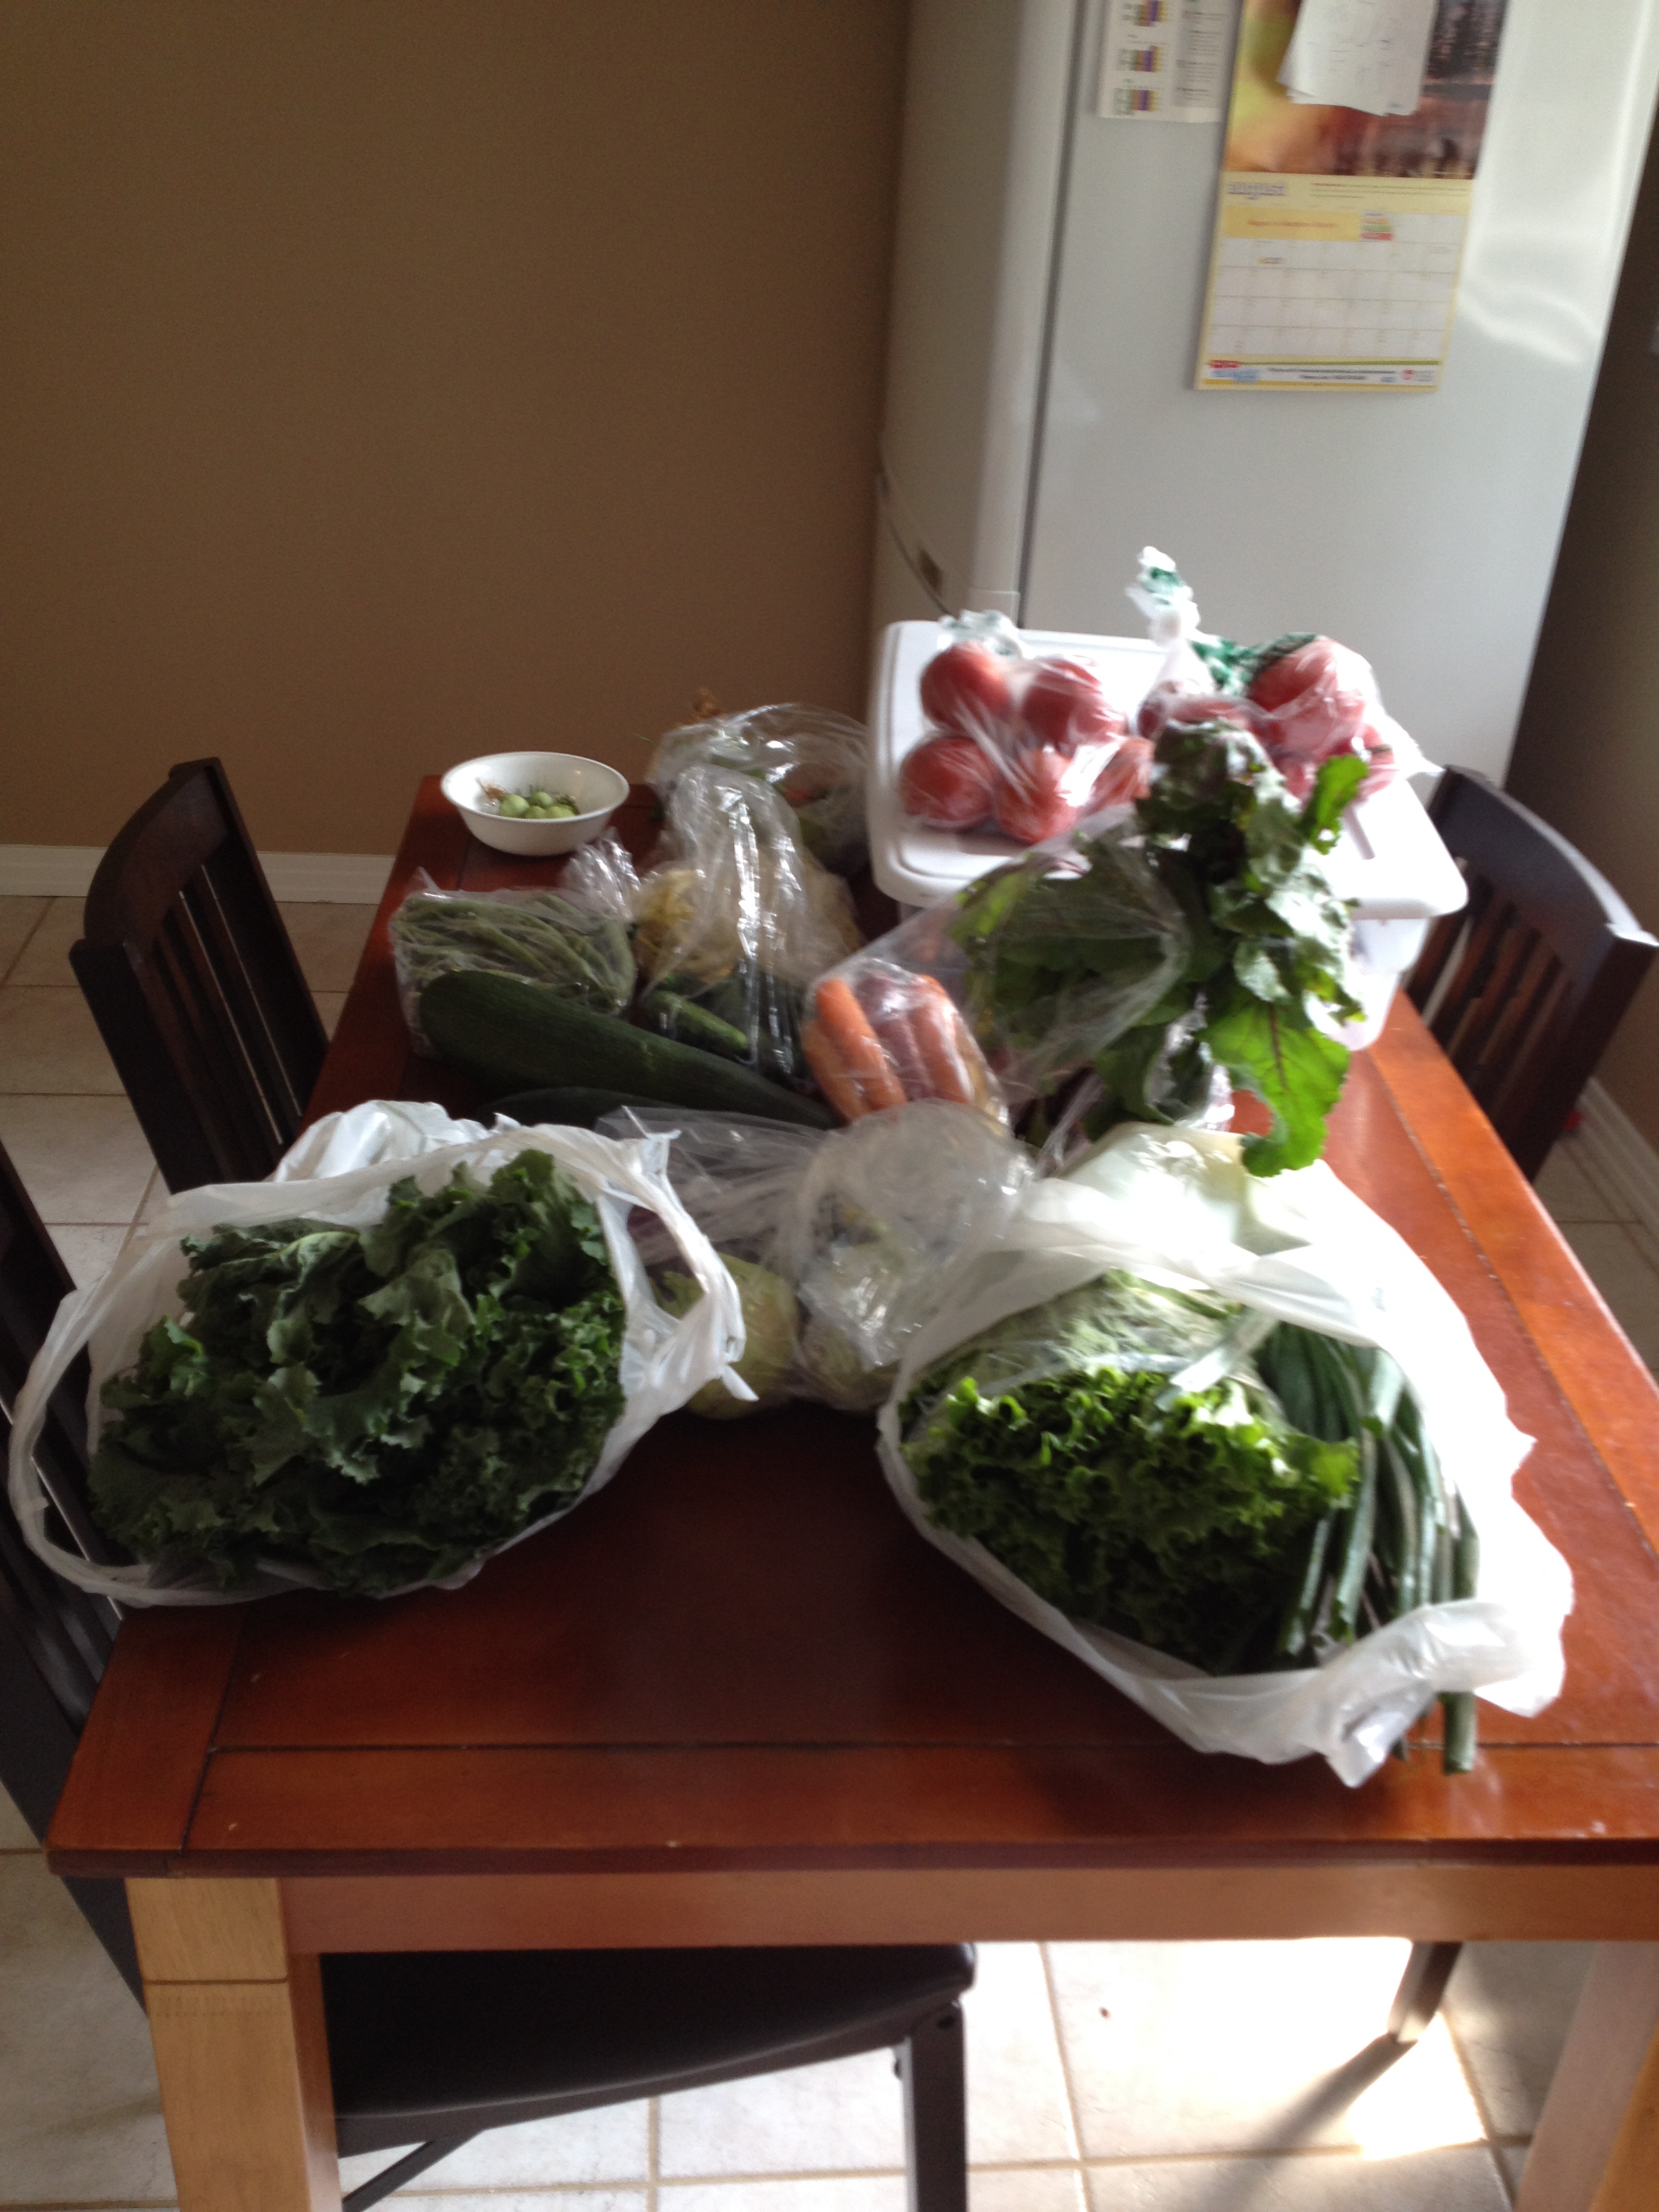
Like grandmas do, they arrived bearing delicious gifts – frozen raspberries and homemade applesauce from my grandma, and fresh raspberries and homemade canned goods from my Nana. After I graciously accepted this bounty, we went out into the yard to see my garden, and spent a great deal of time out there observing, discussing and just enjoying ourselves. I think they got the biggest kick out of my squash plant that seemed to cover half the yard! How great that I had the chance to share my garden and pick the minds of these two wise women?

That green plant on the ground is my buttercup squash … it seriously took over the yard shooting out long vines everywhere! 

When they were leaving, I was proud to send my nana off with a buttercup squash. It felt nice to finally be able to give my nana something from my garden, after years of getting fresh vegetables from hers.

It was definitely a special afternoon, one that has been captured in my memory.

Tomatoes GaloreI suppose it’s time to get down to this week’s recipe…

So of everything I planted in my garden, three vegetables were most plentiful – zucchini, buttercup squash and tomatoes. As many of you may know, I have already done a zucchini edition. This leaves tomatoes and squash, and this week’s feature is tomatoes!

With plants taller than me, I got quite the tomato harvest this year. I planted two types of tomatoes and by far the best variety was ‘Brillante’ (I am writing this down for next year.) I didn’t think a single plant could hold so many tomatoes!

So I decided this week to provide some simple and quick tomato recipes.

The first is a boccaccini salad, where the tomato is layered with sliced boccaccini and basil, drizzled with olive oil and salt and pepper. A simple, fresh and easy salad to make. Alternatively, you can buy smaller boccaccini and chop your tomato and basil, add garlic and eat it out of a bowl. A third method of serving was an idea of Jackie. Skewer your salad! Use cherry tomatoes and mid-sized boccaccini cut in half, with the whole basil leaves.

Kudos to Lori for doing such an exceptional job plating the boccaccini salad.

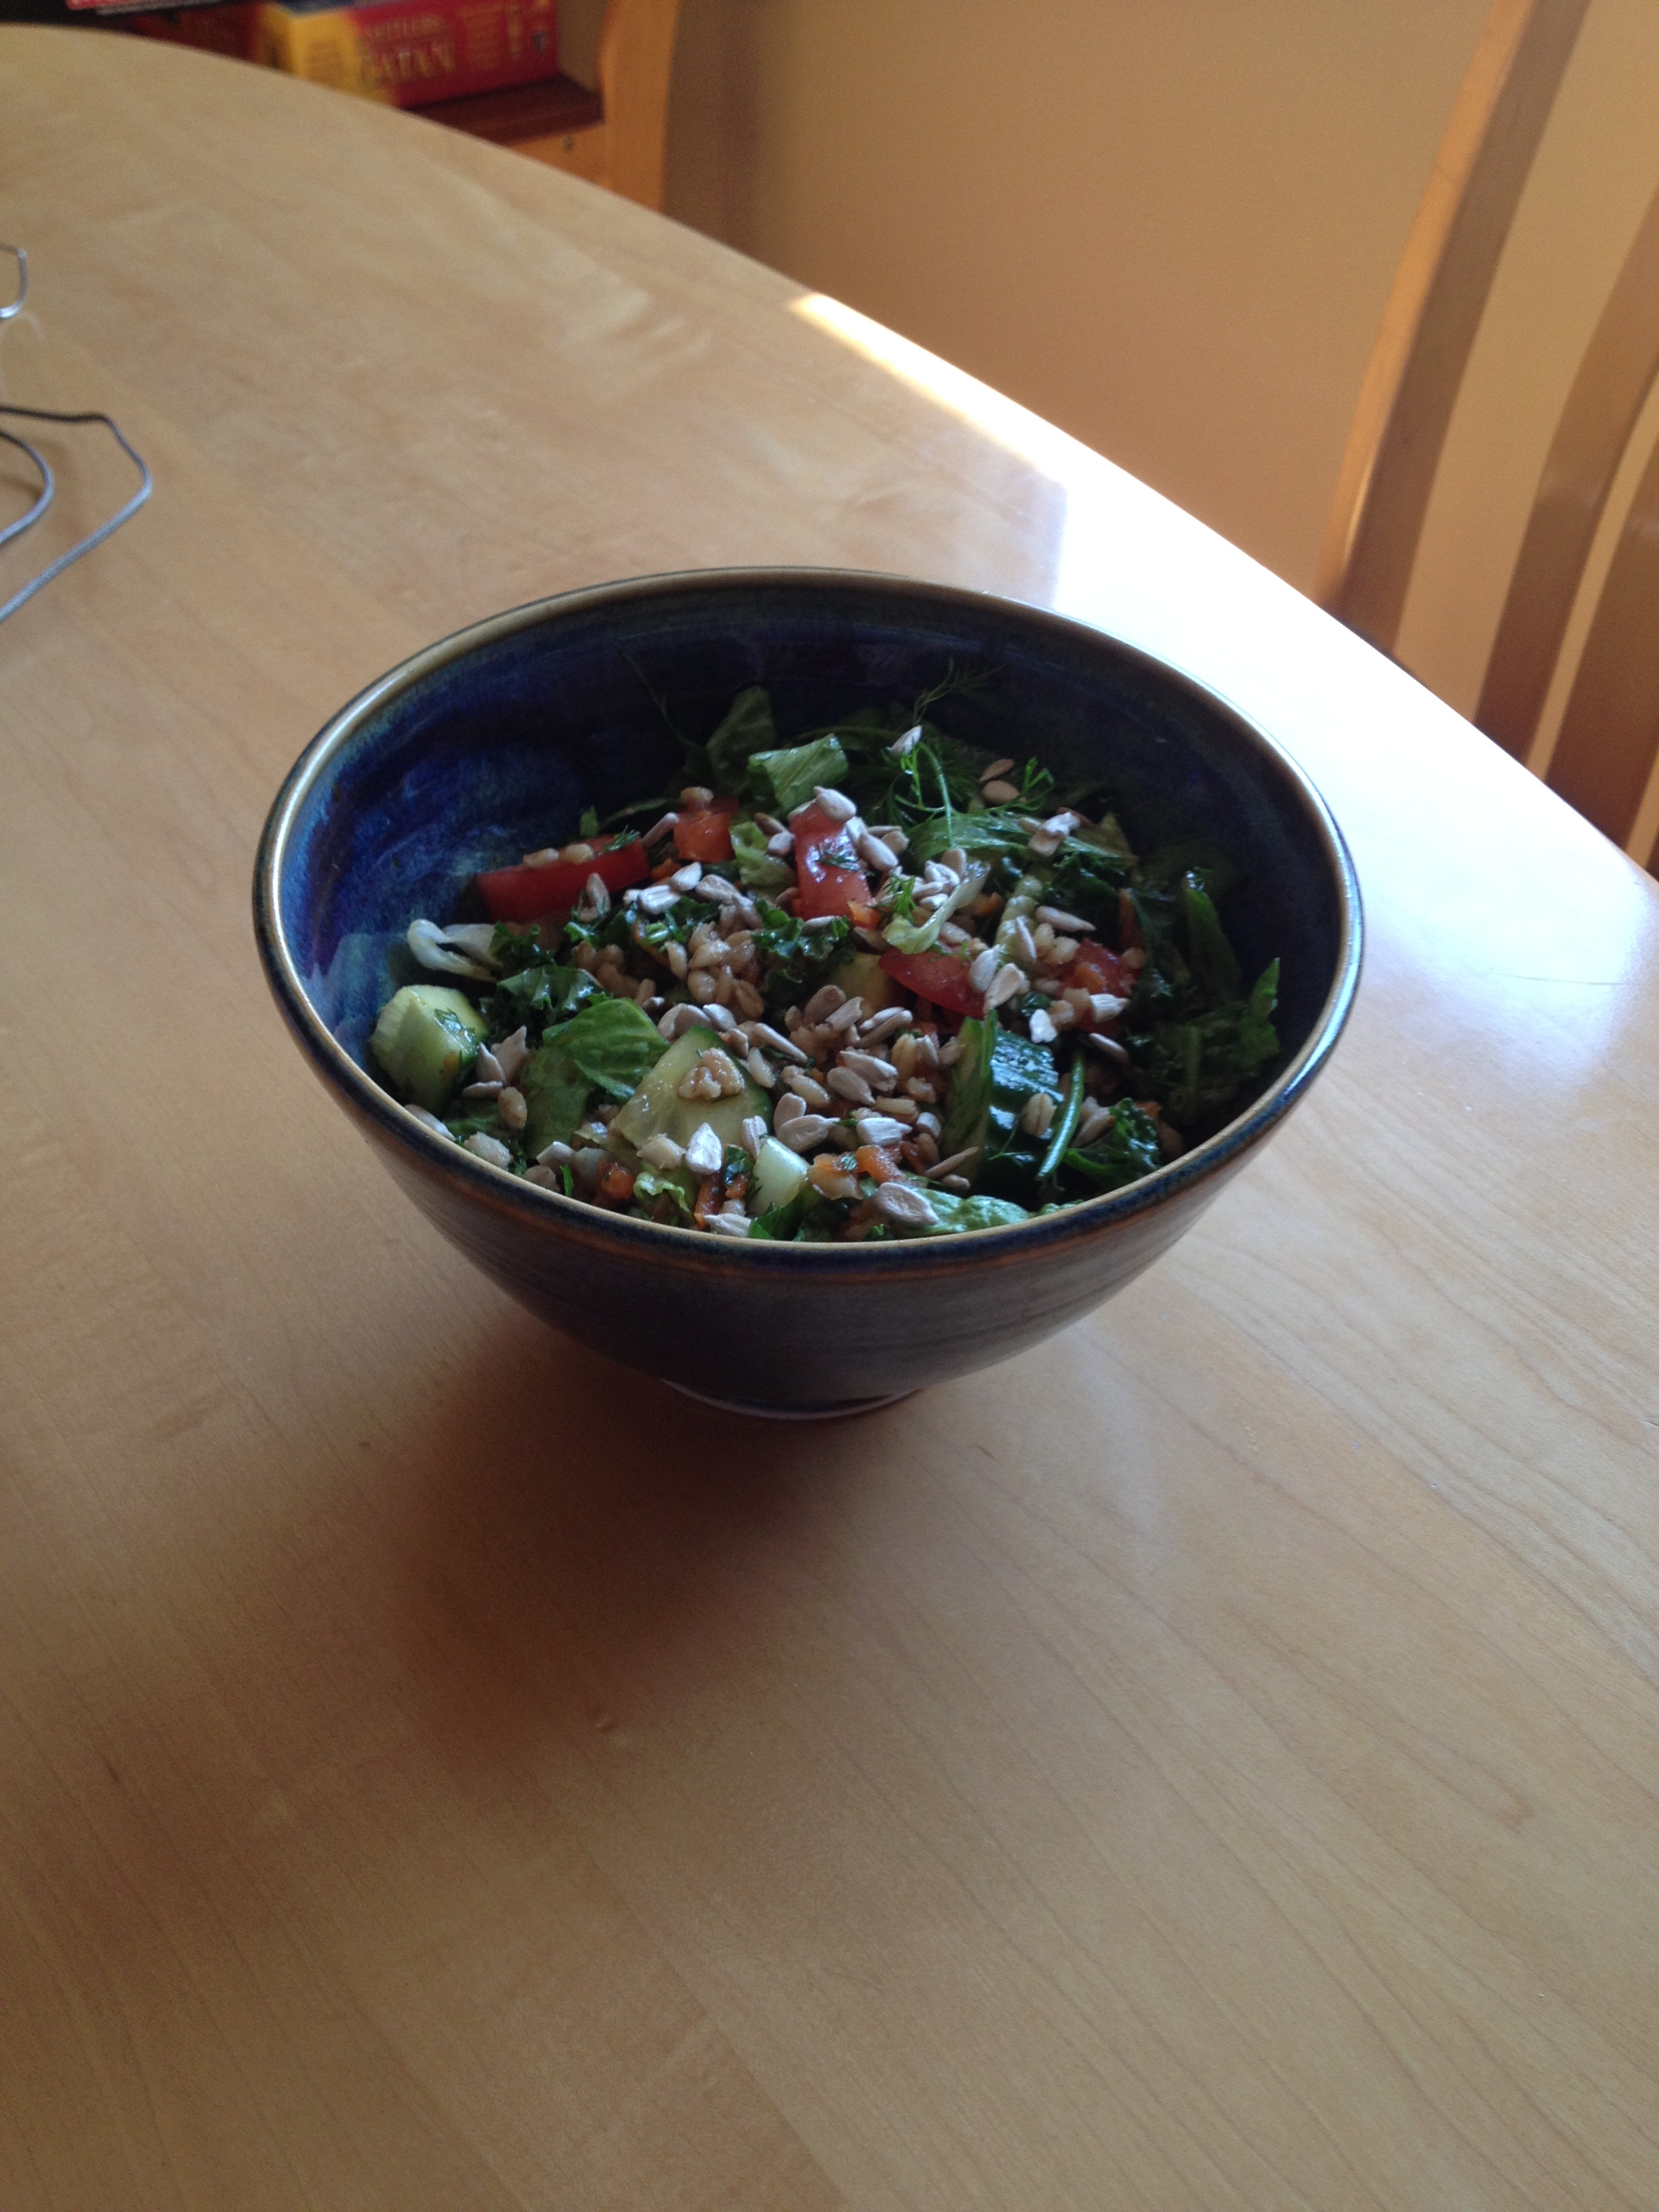
The second salad is one my mom has done over and over again for years, a family staple and a nice, fresh appetizer for any meal. As we always seem to have feta on hand, this tomato salad features the delectable cheese. Like the boccaccini salad, slice your tomatoes into circles. Add salt and pepper, minced fresh or dried basil, a drizzle of olive oil and of course, crumbled feta. This is simple and tasty, and a wonderful way to get in your vegetables! (Tip: This also works great with cucumbers!) Another idea for presentation is skewers (thank Jackie for this one.) Skewer cherry tomatoes and boccaccini sliced in half with basil leaves. Colorful and delictable!

Finally, we have the classic fried green tomatoes. Like many of us, I have known about this southern special for years, but didn’t try it for myself until just recently. It’s super easy – fry up your sliced green tomatoes in butter or oil, add some salt and pepper and parmesan cheese. Lori was the one who suggested adding the parmesan cheese while the tomatoes are still frying, as the parmesan kind of creates a nice crust on the tangy green tomato. Definitely worth trying, and takes minutes to make!

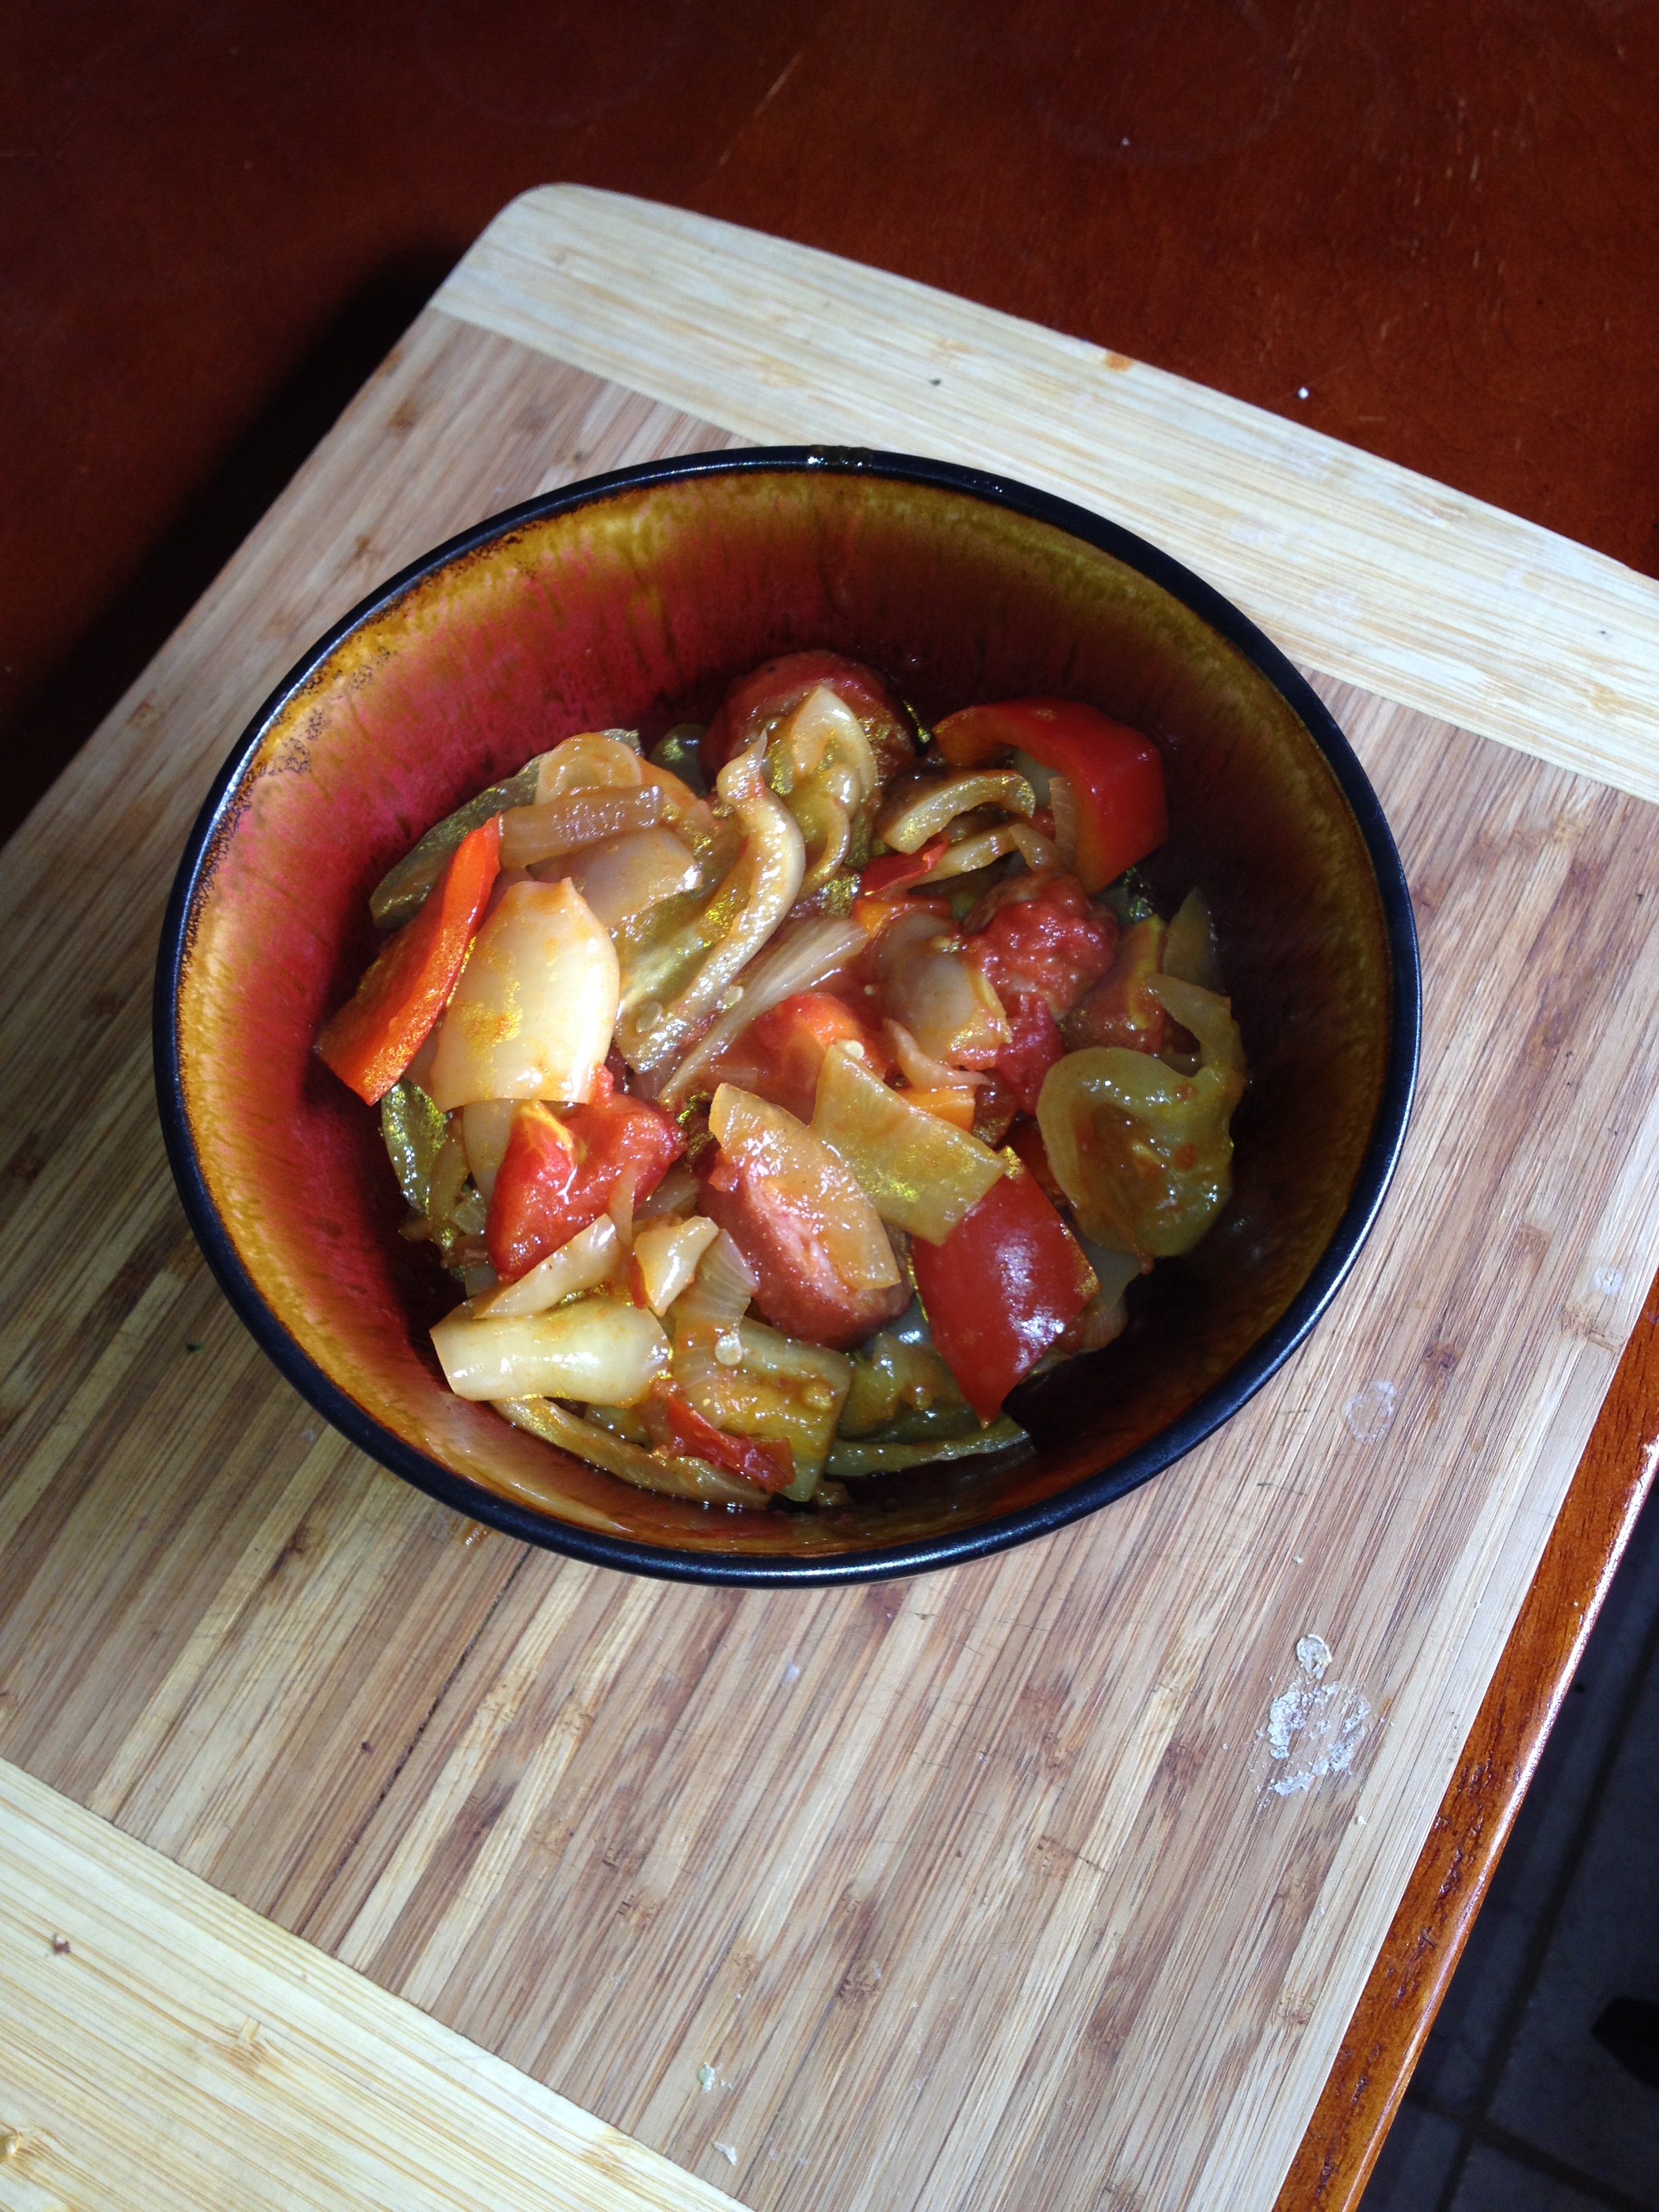
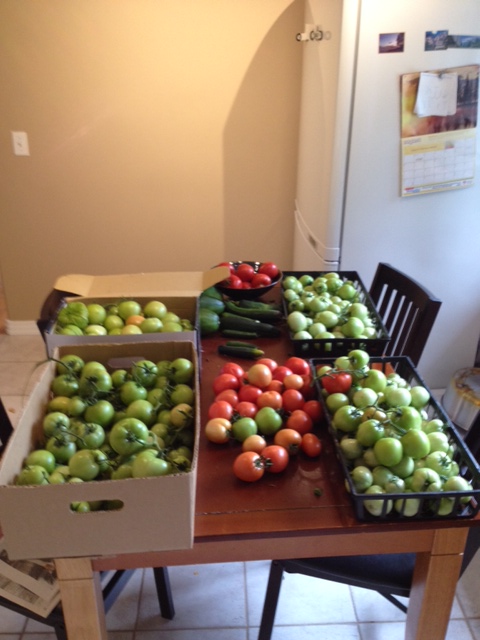
So I have boxes and boxesof tomatoes. Although most of them are still green today, covered in a dark, cold room, I have a sneaking suspicion that they will start to ripen too fast for me to keep up with just eating them all fresh, so perhaps a pasta sauce or tortilla soup will be in order down the road!
Ingredient I can’t live without:

TOMATOES
With the tomatoes I got from my garden, I won’t have to worry about living without tomatoes for a while.

So special thanks to everyone who has helped with my garden this year: My Grandma for the best compost you can get, my Nana for the advice, my mom for clearing out shovelfuls of quack grass, John for saving my tomatoes when they were all falling over, and Lily for help with the harvest! Every one of you helped make my garden a raging success this year!

Bon appetit,

Julie

Click here to view printable Word version of all 3 recipes:
Quick Tomato Recipes

___________________________________________________________

3 Quick Tomato Recipes

Boccaccini salad, Tomato feta salad, Fried green tomatoes

Boccaccini Salad

Tomatoes
Boccaccini
Fresh basil
Olive oil
Salt and pepper
Garlic (use in salad version)
Balsamic vinegar (optional)

Plated Style:

Requires large boccaccini

Slicetomato into round slices. Slice boccaccini into large slices. Layertomato slice, boccaccini slice and a leaf of basil. Drizzle with olive oil and salt and pepper to taste. Add balsamic vinegar (optional)

Salad style:

Requires smaller boccaccini.

Cut tomatoes into chunks. Slice boccaccini into small bite-sized pieces, depending on the size you buy. Add minced basil, minced garlic, olive oil, and salt and pepper.

Tomato Feta Salad

Tomatoes
Basil, minced
Crumbled feta
Olive oil
Salt and pepper

Directions:

Slice tomatoes into round pieces. Lie pieces flat on a plate. Top with basil, drizzle with olive oil, and salt and pepper. Add crumbled feta.

Fried Green Tomatoes

Green tomatoes
Oil or butter
Grated parmesan cheese
Salt and pepper

Directions:

Slice tomatoes into round pieces.

Heat pan, and melt butter or oil in pan.
Add tomato circles to hot pan, fry flip and fry on other side.
Add parmesan cheese, salt and pepper. Fry until tomatoes are ready to eat. The parmesan cheese should form a nice crust on the tomatoes.

Clearwater BC: John’s BBQ Bacon Wrapped Chicken Thighs

Grilling

Hello everyone,

So John and I were able to get out and do some camping over September long weekend. We each took a day off work to extend the trip a little. We headed to BC, and stayed at the North Thompson River campground in Clearwater, a place that my family has visited as long as I can remember. From there, much of the trip was focused on trout fishing. We headed up to Bridge Lake, a beautiful mountain lake where John was able to try out his new motor for the first time. Near town, we went down to the river, where the salmon run was in full swing. The bright red salmon jumping out of the water was a real treat to watch. Finally, on the last day, we drove up through Wells Gray Provincial park, viewing beautiful waterfalls and fly fishing in the crystal blue-green Clearwater river. The fishing weren’t biting much, but we had a wonderful time nonetheless, just enjoying the serenity of nature.

So as you can probably guess, John and I take our cooking while camping as seriously as we do at home. John does not skimp on the cooking equipment either, as he bought a portable BBQ/smoker to bring on the trip. Below, you can see it in our camp set up: pretty plush hey? It rained on and off all weekend so the gazebo was nice to have, as we were able to make dinner even in a thunderstorm!

So for this edition, I want to share a couple of our camping dinners from this last trip to Clearwater. The recipe of the week is something we came up with from a trip to Kelowna a couple years back, but we will get to that later.

First was our best breakfast. We took peaches we purchased at a local farmer’s market and wrapped them in foil with butter, brown sugar and cinnamon, and cooked them on the grill. The result was basically peach pie filling. We served this on pancakes with a raspberry syrup that my Nana made for us. Delicious!

We set out to find some steaks at the local grocery store in Clearwater, but as spoiled Albertans, we weren’t blow away by the steak selection. But much to our excitement, by some sort of Christmas miracle, we were able to find thick cut short ribs! Sitting about 5 feet away from the meat section were bottles upon bottles of Maui rib marinade. After marinating the ribs for a full day, John threw them on his smoker, and after a nice slow cook, the result was delicious. The bonus part about this meal on my part was that there wasn’t very much prep work to be done. So this gave me some time to jam out on my guitar in front of the camp fire sipping on a Okanagan Spring beers while John kept an eye on the ribs.

Funny story. When John was sitting next to his smoker, he said a couple walked by our campsite. They stopped, looked, and then did a double take. They whispered among themselves, started to walk, then stopped and looked again, whispering and pointing. John figures either they couldn’t believe he had a full-sized smoker out camping, or that they had no idea what he was doing and thought he had some kind of large smoking  bomb sitting in front of him.

As delicious as they are, the above mentioned meals we had don’t really cut it as far as a ‘recipe’ goes. So for one of our most memorable camping meals to date, I am going to look back to a trip we took a few years back.

It’s not easy to find a replacement transmission for a 1985 Volkswagon camper van. After quite a while searching, John got the van up and running which was a great surprise for me.We took it on a trip to Kelowna. Me in a hippy van?! Hooray! All of my fantasies of living in the 1960’s were finally to come true! (minus the pot and tye-dye of course.) We found a nice little lake, uninhabited by other campers with no campground even close by, and set up there for about a week. We spent the days fishing for trout in the nearby lake, cooking up our catch, having campfires and just relaxing in a beautiful isolated setting in the Okanagan. We were even visited by a couple of black bears, which John gallantly shooed away while I hid in the van. Such a good boyfriend, protecting me from bears and all.

It was a lovely relaxing trip, and unlike any I had experienced before. Staying in the same spot, soaking up mother nature with no other humans around was a lovely time indeed. This is where we came up with this week’s recipe, Bacon-Wrapped Chicken Thighs! We made this on the first night there, before we had caught any fish. We had purchased thighs for dinner, and bacon for breakfast and the result was both a succulent and crispy treat.

Now we made these again in late August this year, and that is where the pictures are from. But this is a camping meal we enjoy from time to time, and I really wanted to share the experience in which these were originally created.
To complement the meat, we served potatoes in foil, wax beans from the farmers market, and grilled zucchini and gypsy peppers from our garden
TIPS:

–          Use thin cut bacon, it crisps up nicely

–          Use a sweet rub – John recommends a mango chipotle rub

–          Use a sauce of your choice. Try your favourite BBQ sauce. We like using Thai Sweet Sauce

–          This only works with boneless skinless chicken thighs

Bon Appetit,

Julie

Click here to view printable Word version of recipe:
Bacon Wrapped Chicken Thighs

_______________________________________________________

Bacon Wrapped Chicken Thighs

INGREDIENTS:

Boneless skinless chicken thighs
Thin cut bacon – 1 slice per thigh
A sweet rub of your choice (try mango chipotle)
Your favourite BBQ sauce or Thai sweet chili sauce
Skewers

PREPARATION:

  1. Season chicken with sweet rub
  2. Wrap with bacon, with the thighs laid out flat.
  3. Use the skewers to secure the bacon on the chicken thigh
  4. One wrapped and on the skewer, add a little more rub on the bacon

GRILLING:

  1. Pre-heat grill to medium.
  2. While grilling, baste everything with the sauce, once or twice.
  3. Takes 30 – 45 minutes until chicken is ready.
  4. If at the end, the bacon is not crispy, turn up the heat and give a quick crisping.

Helmkcan Falls

Borscht and the Farmer’s Market

Borscht

Hello everyone,

Now if you know me, you know how much I love farmers’ markets – fresh produce, baking, pickles and samples galore. I gladly dive head first into the mosh-pit of eager and sometimes aggressive shoppers, bent on getting my hands on so many delightful goodies. Also, if you know me, you know I don’t drive, so when it comes to places to go, walking distance makes a big difference in my life. But when I moved to St. Albert, little did I know that the town is home to western Canada’s largest outdoor market. (John did realize this!)  And how lucky am I that this magical, gigantic farmers’ market is only a 15 minute walk from my front door? Pretty lucky indeed!

Such a vast market has so many interesting things to offer. You have the classics – pottery, furniture, jewelry, pickles, pies and grannies selling knitted doily thingies. But this farmers’ market goes much further than most. The St. Albert market boasts anything you would want and more. Fish, organic chicken, eggs and sauces all over. But wait, I’m just getting started. I frequently buy fresh pasta and pesto, Blue Kettle dressings, or honey. There is an Indian booth, a Mexican booth and a Jamaican booth, that make great na’an bread, corn tortillas and beef patties respectively, all boasting dips, sauces and other frozen delicacies. There are booths offering Greek dips, and by my last count two green onion cake vendors, and at about 4 selling Ukrainian food (people in St. Albert must really like their perogies). Other interesting vendors include the wild mushroom stand, the maple syrup guy, and this booth that sells an assortment of these adorable pop-up cards for all occasions. There is a brownie stand I adore that sells these wonderful little one bite brownies of all different types. I love going to the Happy Camel booth and sampling their pita and hummus (they make the best hummus at the market – I have sampled them all!) There are also food trucks parked all around, and musicians at every corner… I could go on and on. If you haven’t had the chance to go, it’s worth the trip – even if you just go for the samples!
St. Albert Farmer's Market

St. Albert Farmer’s Market

Produce is key to any farmers’ market, and this market boasts a wide variety. From Kuhnlman’s, to White’s (who have the best tomatoes at the market) to Steve and Dan’s gigantic BC fruit stand (I can’t help but stand and ogle the smorgasbord of beautiful fresh fruit at this one), there are dozens of produce vendors often with piles and piles of produce to sell. This market runs Saturdays from mid-June through Thanksgiving weekend, and I really like to take advantage of the ability to buy fresh produce in the summer and fall months, as I am not granted this luxury year round. Of course, It’s not as cheap as the grocery store, but it’s so nice to get fresh vegetables and fruits from a local trusted grower. The fruit is really pricey, so I usually treat myself to only one type of fruit each visit (last week was Reinier cherries) but I admit, I tend to go pretty crazy on the vegetables. Beets, kohlrabi, carrots, onions, fresh dill, green beans, kale and of course tomatoes are some of the regulars to make it into my bag.

John found this wonderful little pull-cart for me at Save-On Foods. It looks like a small golf bag and allows me to buy as much as I want at the market without the use of a car or a guy named John to carry vegetables back for me. John has never turned me down when I ask for his help, but with my new cart, I can head down by myself and load up my cart with vegetables from the market and haul it back home! Pictured below is my last vegetable haul from the farmer’s market.

I look forward to the farmers’ market every weekend, and never fail to enjoy myself. Whether I am there with friends, family, John or by myself, I always have a wonderful time.

So in the spirit of vegetables, I have decided to make Borcht my recipe of the week. With beets, potatoes, carrots, cabbage, fresh dill and any other vegetable you would like to add, a trip to the farmer’s market is a great way to acquire all necessary ingredients for this Ukrainian soup. My Nana makes such fantastic borscht, so I got the recipe and method from her. This classic Ukrainian soup is so simple and takes no time at all to make.

My Vegetable Haul

My Vegetable Haul

TIPS:
– Remember to use the beet greens in your soup
– If you buy fresh beets (like the ones at the farmers’ market) there is no need to peel them as the skin is nice and tender
– This soup freezes very well, providing you don’t add the potatoes.
– Serve with a dollop of sour cream

Ingredient I can’t live without:

SOUR CREAM
Soups, perogies, tacos, chilis and cakes – the perfect moistener for so many things. My Ukrainian soul embraces this ingredient that is critical to life itself.

So try to get out to the farmers’ market this year if you haven’t already, and treat yourself to some fresh local produce before the weather turns on all of us!

Bon appetit,

Julie

Click here to view printable Word version of the recipe:
Borscht

______________________________________________________

Borscht

Vary the quantities of vegetables depending on how much soup you want to make.

Beets – use leafs and stems as well
Try using 4 medium beets, more if desired

Any combination of the following:
Carrots
Peas
Green beans
Onions
Cabbage

Potatoes – if you are not freezing

Parsley
Dill

2 – 3 chopped cloves garlic
Salt to taste

White vinegar or pickle juice

Directions:

  1. Fry onions in oil so they are cooked, even a little.
  2. Add all other vegetables to the pot.
  3. Add water to cover the vegetables and then about one inch more.
  4. Bring to a boil. Simmer for about 30 minutes, or until vegetables are soft.
  5. Add white vinegar to taste – start with 1 tbsp and then keep adding if desired. You can try adding pickle juice as well.
  6. Serve with a dollop of sour cream

Freezes very well (providing you don’t add potatoes)

Korean Short Ribs

Plate

Hello everyone,

So the good news is that I have more recipes and topics to write about then there are weeks in the summer. I have a backlog of ideas and recipes to send to all of you…and it isn’t even August yet! At the rate my food adventures are going these days, I will be sending you summer emails well into the fall!

This next meal happened back on July long weekend. What is truly great and special about this week’s recipe is that I did nothing. That’s right, nada. Zilch. No planning, no cooking, not even a hint of prep. I sat back and watched as all of the work was done by someone else!

Usually, meals are a team project. At the cabin, we all pitch in and work together. At my house, John and I are the perfect cooking tag-team (me on the sides, John on the grill). At my mom’s, I always try to chip in. But to sit back and have someone else make the whole meal for you, that is a special treat!

We had an old BBQ at the cabin only a few months back. And when I say old, I mean there is a chance this BBQ was older than me! Back in May or June, Steven attempted a beer can chicken on this thing, and after several frustrating episodes of flames and fat and unwanted chicken crisping, Steven promptly decided that we needed a new BBQ for the cabin. We take special care and pride in our meals at the cabin, and a good, reliable BBQ is key to success.

Steven had been planning on getting a BBQ for his place in Calgary anyways, so after the chicken episode, he decided he would buy a new BBQ for the cabin this summer, and take it home the next. After some shopping, Steven selected his new love, a love that happens to be named Weber. After witnessing John’s love for his new Komado and Steven’s love for his new Weber, I think I am finally starting to understand (a little) how the minds of men work.

So the boys assembled the new BBQ (this was no easy task, put it this way – there were instructions on how to unpack the thing!) and were ready to take her on her maiden voyage. To do so, Steven and his good friend Joachim planned a fantastic meal. Much to the delight of myself, my mom and my cousin Lori, the girls didn’t have to lift a finger!

So the evening’s menu’s main feature was Korean short ribs. This was no simple task. Steven made a special trip to buy Asian pears, a special Korean sauce and just the right cut of meat. The marinade was made the night before, as the short ribs need to marinade for about 24 hours.  The boys also marinaded pineapple, zucchini and Asian pear, and crisped some broccoli on the BBQ – and a homemade Korean dipping sauce. Everything was grilled to perfection, and we feasted!

This week’s recipe is the Korean short rib marinade.  I fully intend to make these at some point this summer. I haven’t done so yet as this recipe does require some planning as you must marinade the short ribs overnight.

Here is the link to the recipe that Steven used. I usually like to send out a word file as you know, but this is a very complete recipe/article that explains a lot. For example, this article differentiates between the traditional Korean galbi and the LA galbi (galbi means ribs in Korean.) Steven made the LA galbi, a style of short ribs that are cut more thinly then the traditional galbi style…who knew?

http://www.maangchi.com/recipe/la-galbi

TIPS:
– Try marinating some fruit or veggies as well

Ingredient I can’t live without:

ASIAN PEAR
Well, apart from this one recipe I have never seen this as an ingredient. However, it is a delicious fruit that taste like half apple half pear, that is surprisingly good on the grill!

Anyways, special thanks to Steven and Joachim for making such a fantastic dinner! We have been creating so many precious food memories at the lake this summer with the new grill already – it brings a tear to my eye.

Bon appetit,

Julie

Click here to view printable Word version recipe:
Korean Kalbi Ribs

________________________________________________

Korean Kalbi (Marinated Beef Short Rib)

This recipe comes care of George Hong, a staff member at D’Arcy’s Meat Market. Korean cut short ribs are also known as Maui short ribs. The cut comes from the chuck, or front quarter of the animal, and works well with a marinade. This recipe yields two to three servings.

INGREDIENTS:

8 pieces of Korean cut short ribs (roughly 1 1/2 pounds/750 grams)

1 cup (250 mL) brown sugar

1 cup (250 m L) light soy sauce

1 cup (250 mL) cold water

1 tablespoon (15 mL) sesame oil

3 cloves of garlic, diced fine

3 green onions, diced

A few slices of fruit diced (pineapple, apple, or pear)

DIRECTIONS:

Start with brown sugar in a bowl and then stir in soy, water and sesame oil. Stir in garlic, green onions and fruit. Add short ribs and ensure that all the meat is covered by the marinade for 16 to 24 hours, using a zippered plastic bag or a piece of deep Tupperware. Remove meat from the marinade and discard any green onion, garlic or fruit that may be attached to the short rib. Discard the marinade.

Preheat the barbecue to medium-high heat. Grill the meat for approximately 3-5 minutes per side, flipping it three times. The bone marrow should not be red at all. Remove the meat from the heat and let it rest for a minute. Then use kitchen scissors to cut into one-bone sections.

Serve with short grain, sticky rice, lettuce leaves, dried seaweed crisps, kimchee and miso soup.

Sunday Dinner: Dill Stuffed Baked Potatoes

Steak Dinner Close

Hello everyone,

So John and I made the most splendid Sunday dinner last night. The menu was completely a spur of the moment decision, and the ideas were just kind of thrown together last minute. But once we had cooked everything and were ready to eat, we realized that what made this dinner so special was the degree to which all courses were homemade, invented, or even home-grown.

1. The feature meat: Steak

John made his own rub for this steak. A take on Montreal steak spice, ingredients included peppercorns, coarse salt, cayenne pepper, onion powder, garlic powder and dried dill. The difference is that John pulverized all of the ingredients In our magic bullet, which we think allowed the spice to penetrate the meat a little better.  The result was possibly the best stake we have had all year. We chose our favourite cut (rib-eye) which John grilled to a perfect medium-rare Chicago style with his homemade rub on his charcoal grill.

2.The steak topper:  Peppercorn Mushroom Sauce

The idea behind my steak topper was to combine a peppercorn sauce recipe with a mushroom sauce. In a pan I sautéed mushrooms in butter, and added coarse pepper flakes, a dash of brandy, fresh thyme leaves and a little cream. Yum!

The vegetable: Grilled Veggies

Our grilled gypsy peppers and zucchini slices were marinated in a homemade sweet and sour sauce. This sauce just happened to be a by-product of a homemade BBQ sauce that John and I had created and canned a few months ago. What made these vegetables extra-special is that they were taken from our garden. The zucchini was one of the monsters featured in my last edition, and the greenish-yellow peppers are called gypsy peppers. This gypsy peppers are just delicious,  combining a little bit of sweetness of a red pepper with a little bit of the zing that green peppers have to offer.

4. The carb: Dill Stuffed Baked Potatoes – our recipe of the week.

These russet potatoes were stuffed with dill, green onion and garlic, and topped with John’s smoked cheddar. Just fantastic.

Tips:
– Select the largest russet potatoes you can find. This will make them easier to scoop out.
– Before baking, stab potatoes with fork several times, brush with oil and wrap in tin foil. Bake at 350 degrees for well over an hour.
– When scooping the flesh out of the potatoes, make sure they are well cooked, otherwise you will have problems performing this task. We found we needed about 1 hour 20 mins to get the potatoes to the point where they were easy to prepare.  Cut potatoes in half lengthwise and using a spoon or paring knife, scoop flesh into a bowl, while keeping the skins intact.
– Try adding other ingredients to your filling – I would suggest trying feta!
– The more dill the merrier!

5. The dessert:

John had a craving for crepes, so we made blueberry crepes. I made the batter, but John did the cooking. John skillfully flipped the crapes on the pan, with a flair for the dramatic. The filling was simpl, blueberries cooked in a pot with no other ingredients added. After rolling the crepes, we sprinkled them with icing sugar.
It’s nice to put in a little extra effort to spoil ourselves on Sunday night, before everyone works the next day. John and I were proud as we created a meal where every dish was made extra special, the reason why I chose to feature an entire meal this edition. Although the recipe of the week would be great with many meals, John and I felt that all the dishes in the meal complimented each other so nicely.

Bon appetit,

Julie

Click here to view recipe:
Dill Stuffed Baked Potatoes


John’s Smoked BBQ Ribs and Salt Lick Rub

The Meat

Hello everyone,

As you have probably figured out by now, John lives for BBQ. With the 4 different BBQs/smokers/BBQ smokers he owns, this is fact is no secret. Since I met John, he was always really good at BBQ, and has managed to continually outdo every previous effort that I deemed (at the time) the best barbecued ____ that I had ever eaten in my life. He finds a way to never plateau. Since the acquisition of the Kamado, John has really kicked it up a few notches, with the BBQ goods getting bigger and better with every effort, what John really wants to do is cook for big groups of people. With all of his devices, he says he could easily cook for 100. I believe him.

We have yet to have the opportunity to host 100+ people for a BBQ (I don’t think there would be enough parking on our street), but luckily for John he has a pretty large family. With his sister Melissa, her husband Jason and their two sons Jayden and Kylan in town from Toronto, John wanted to take the opportunity to dazzle his loved-ones with a mind-blowing mountain of glorious smoked meat. And as you will see, he succeeded at achieving this goal.

As you can probably imagine, any large scale BBQ put on by John requires a massive commitment. So I thought I would take you through the steps it took to get the meat from the store to your belly!

Step 1: Meal Planning

John and I tried to model this meal after the dining experience we had at our precious, precious Salt Lick restaurant in Texas. This meant the classic Texas trio of smoked meats – beef brisket, ribs and sausage. I would aim to create the typical accompanying side – coleslaw, potato salad baked beans, and of course corn bread!

In case you haven’t noticed, pulled pork is a hot thing here in Edmonton these days. I barely knew that pulled pork even existed 5 years ago, and now people are putting this trendy food in everything from sandwiches, to poutine, to tacos, to pizza to who knows what else. Coming from a pulled-pork obsessed culture, John and I were surprised to find that there was barely a mention of it in Austin. There, the focus is on the brisket, king of barbecue.

Step 2: Acquiring Food and Other BBQ Related Products

The brisket is a large piece of meat. A standard brisket is around 9 to 12 lbs. For those wondering, the brisket is a cut of meat from the breast or lower chest of beef. As cattle do not have collar bones, the brisket muscles support about 60% of the body weight of standing or moving cattle. Now 12 lbs. of any meat is never cheap, however thanks to a tip from Cody, we made the trip down to K & K, the European store in the south side, and purchased a brisket at a much more reasonable price than most other butcher shops. Next, we swung by Costco to pick up 4 racks of side ribs and a dozen honey garlic sausages. A Save-On run to pick up all the other groceries, and a dollar store run for misc. party items, there was only one other important stop.

John needed to figure out a way to serve meat to 15 people, ie. something to serve the meat on. For smaller parties or for just the two of us, we have this large cutting board that he uses to serve BBQ meat. As we have a picnic table, John came up with the idea of purchasing a long board and lying it across the picnic table, with the meat to be thrown right on the board. So off to the hardware store!

MeatStep 3: Dinner Prep – The Day Before

On my part, I just tried to get as much cooking done that I could (I worked the next day and would only be home a few hours before guests would arrive.) I got the crock pot ready for my baked beans, chopped up the coleslaw, made the dressing, and of course, marinated the sangria!

For John, preparing the brisket was key. The cut wasn’t perfect so he had his work cut out for him. He had to start by removing some of the fat, and effort that takes some time and precision. You can see John pictured below with his brisket. As you can imagine, it takes some time to smoke an 11 lb. piece of meat. As a result, John was up at 2:00 in the morning, heating up the smoker, putting rub on the brisket, setting his thermometers, selecting the appropriate types of wood to smoke, and of course getting the brisket in the smoker, all before returning to bed. In order to have the brisket ready for dinner the next day, getting up this early was a necessary step as I don’t think our guests would take too kindly to a midnight dinner!

Step 4: Dinner Prep – The Day Of

With smoking times of any meat differing depending on numerous conditions , timing is always a challenge. On my part, I am concerned with having all the side prepared to the point where I can get them all out at the drop of a hat, to be served at the same time as the meat. I am usually given a large window, and have to act fast once John is able to give a more concrete done time. John is concerned with having is 3 different meats in 2 different smokers smoked with different types of wood being cooked over various time periods ranging from 4-16 hours that also need to be relaxed and thrown on the propane grill quickly all being ready at the same time. I think the length and detail and run-on-ness of the previous sentence makes it clear how challenging this can be! Nothing ever goes quite as planned, but after a few snags and some complicated timing issues, John was able to have all 3 kinds of meat out all at the same time. Not an easy feat

The sides were great too, slow cooked beans in the crockpot, coleslaw with a light vinegar based dressing, right form the Salt Lick cookbook, and a very nice potato salad featuring strawberries, blueberries and arugula. John also busted out his deep fryer, filled it with water and boiled a pile of corn for everyone to enjoy. Sabrina was kind enough to bring her famous jalapeno cornbread, which was promptly demolished by all. This cornbread is better than any I have had at any restaurant!To top things off we had strawberry rhubarb pie with ice cream. YUM!

Step 6: The Aftermath

As no one eats healthy portions of food at a BBQ of this magnitude, the general sentiment was that of an over-stuffed group of people. Some coped quite well, while others were strewn about on the ground, unable to walk, with rolling the only way to get from here to there.

Now, it is likely most of you don’t own the assortment of barbecues that John does, so he has kindly adapted this week’s recipe for a propane grill. This week’s recipe is John’s ribs. As mentioned above, we like our ribs pull-of-the-bone, as opposed to fall-off-the-bone. Try this method and we are certain you will agree!

John urged me to send out the Salt Lick BBQ sauce as last week’s recipe to ensure that you would have it on hand before you take a crack at these ribs. Ribs and Salt Lick sauce are like two peas in a pod, and John highly recommends that you take the time to make your own BBQ sauce for your ribs! John even did me the favour of meticulously typing out the rib recipe for you all, so give it a shot! (although I suppose it’s more of a technique then a recipe)

Special thanks to Sabrina for bringing the cornbread, and for my mom for our pie-making afternoon a while back. Making pie with you mom is always fun, and a pile of pies is the gift that keeps on giving.

Thanks to the weather for holding up, and to mother nature for putting of Edmonton’s dreadful mosquito infestation for a few more days.

Also, thanks to all of our wonderful guests for coming and making our BBQ such a memorable evening!

Bon appetit,

Julie

Click here to view printable Word version of recipe:
John’s Smoked BBQ Ribs – Smoker Instructions
John’s BBQ Ribs – Gas Barbecue Instructions
Salt Lick Rub

________________________________________________________

JOHN’S SMOKED BBQ RIBS

Many try for the much sought after “fall off the bone” ribs. This is a mistake. To preserve flavour, the objective is to create “pull of the bone” ribs, where a gentle pull is required before the meat comes clean off the bone. This recipe will guide you create your very own tender, pull off the bone ribs.

Ingredients:

Side ribs
Mustard Based BBQ Sauce
Rub (see end of document for recipe)

Rib selection:

Select side ribs over back ribs. Costco has the best deal in town and a good quality product.
The thicker the better! Look for an even fat marble.

Trim Your Ribs:

Start by removing the silver skin / membrane around the ribs. This will prevent them from becoming chewy after cooking.

Please also note that Costco ribs come with the brisket bone off and fajita skirt still on.  The fajita skirt is a Mohawk shaped cut of meat that protrudes from the underside of a side rib selection.  Cut this off flush with the rack and cook separate. (These little guy’s get ready much faster and are a tender boneless treat to enjoy while waiting for the rest to finish)

Smoker Directions:

  1. Preheat smoker to 250F.
  2. While pre-heating your grill, pull your ribs out of the fridge and apply an even coat of rub to both sides.
  3. Smoke ribs meat side down for one hour with hickory, oak or apple (John’s preference is a hickory apple combination, a nice sweet and tart combination.)
  4. After 1hr baste ribs with a mustard based BBQ sauce (we like our homemade Salt Lick BBQ Sauce.) Take care to baste both sides and all ends as well. Place ribs fat side down after the baste.
  5. Cook fat side down for 2 ½ more hours or until internal temp is 175F
  6. As a finishing touch, give the ribs a light sear on each side on high heat for a nice finish.
  7. Relax ribs for 15 minutes before serving.
  8. Serve with extra Salt lick sauce for dipping. (Keep dipping sauce and basting sauce separate to avoid any contamination)

Get messy and enjoy!

Salt Lick Rub

7.5 oz Morton salt (Or regular medium grind salt works too, not too fine)

3 Oz Black pepper medium grind (not the fine stuff, grind yourself if possible)

1 ½ Oz ground cayenne pepper

__________________________________________________________________________

JOHN’S GAS BBQ RIBS

Many try for the much sought after “fall off the bone” ribs. This is a mistake. To preserve flavour, the objective is to create “pull of the bone” ribs, where a gentle pull is required before the meat comes clean off the bone. This recipe will guide you create your very own tender, pull off the bone ribs.

Ingredients:

Side ribs
Mustard Based BBQ Sauce
Rub (see end of document for recipe)

Rib selection:

Select side ribs over back ribs. (Costco has the best deal in town and a good quality product.)
The thicker the better! Look for an even fat marble.

Trim Your Ribs:

Start by removing the silver skin / membrane around the ribs. This will prevent them from becoming chewy after cooking.

Please also note that Costco ribs come with the brisket bone off and fajita skirt still on.  The fajita skirt is a Mohawk shaped cut of meat that protrudes from the underside of a side rib selection.  Cut this off flush with the rack and cook separate. (These little guy’s get ready much faster and are a tender boneless treat to enjoy while waiting for the rest to finish)

Gas BBQ Directions:

  1. First start your grill. Be sure to only start one burner on the furthest side from where your meat will be cooking to ensure a nice even indirect cook. You want to adjust the controls in such a way that the BBQ holds an internal temp of 220F-260F.
  1. While pre-heating your grill, pull your ribs out of the fridge and apply an even coat of rub to both sides.
  1. I recommend the use of a smoker box with Hickory and Apple wood in your BBQ. Place the smoker box under the grill and over the burner on the opposite end of your meat, for indirect smoking. Put a foil pie tray filled with water or your favourite marinade on the grill between the smoker box and meat. This will keep your meat moist. (John recommends equal parts of apple juice and apple cider vinegar as your marinade.) If you don’t have a smoker box, skip this step – your ribs will still turn out great!
  1. Place ribs on pre heated grill meat side down and close lid. Maintain 220F-260F for 1hr
  1. After 1hr baste ribs with a mustard based BBQ sauce (we like our homemade Salt Lick BBQ Sauce.) Take care to baste both sides and all ends as well. Place ribs fat side down after the baste and alternate which ribs are closest to the heat source.  It’s best to keep the larger racks closer than the smaller racks but in general keep all ribs out of any direct heat.  Rib rack holders can help if you are cooking large amounts on a small grill and can be bought at any department store like Walmart, Canadian Tire, Home Depot, Lowes etc. for cheap.
  1. Cook fat side down for 2 ½ more hours or until internal temp is 175F
  1. Remove smoker box and water tray. Remove ribs and turn burners to high and let come up to temp while giving ribs another baste. Once basted give the ribs a quick 30sec-1min crisp on each side but not any longer as the sugar content in the sauce will cause burning on your beautiful ribs.
  1. Turn burners off and leave ribs in grill to rest for 10-15min to further relax the meat.
  1. Serve with extra Salt lick sauce for dipping. (Keep dipping sauce and basting sauce separate to avoid any contamination)

Get messy and enjoy!

Salt Lick Rub

7.5 oz Morton salt (Or regular medium grind salt works too, not too fine)

3 Oz Black pepper medium grind (not the fine stuff, grind yourself if possible)

1 ½ Oz ground cayenne pepper

Austin, Texas and Salt Lick BBQ Sauce

Salt Lick

Hello everyone,

So with BBQ season comes BBQ sauces, and everyone always seems to have their favourite. For many, it might be the classic Bull’s Eye. For my family, we often take advantage of the 2-pack of Cattleboy’s at Costco, a great all around sauce. John and I have always enjoyed trying different BBQ sauces from different places. We always end up buying a few sauces wherever we travel – California, B.C., Utah – there seem to be BBQ sauces everywhere! My brother was kind enough to bring me a BBQ sauce a while back from a small BBQ joint in Natchez, Mississippi which was quite the treat!

When John and I traveled to Texas last March, we hoped we would discover some fantastic BBQ sauces. In our minds anyways, ‘Texas’ is synonymous with ‘BBQ,’ so we were excited to see what Texas had to offer.

If you have been reading my emails (or spoken to John or myself about our trip to Texas,) you will know that our visit to the Salt Lick BBQ pit just outside of Austin had to be our trip highlight. This massive proprietorship that apparently serves over 600,000 people a year won us both over before we even tried to food. We arrived late, around 9, and still had to wait an hour to be seated. During this hour, John and I took advantage of the all the interesting things to see, do and buy in this massive building, running around buying t-shirts, sauces, rubs and our beloved Salt Like cookbook. We also got a good look at all of the meat they were smoking, with sausages hanging, and more brisket then we will probably see in our whole lives. The meal itself was fantastic, with all-you-can-eat trays of brisket, sausage, ribs, coleslaw, baked beans and potato salad being delivered to our table, a meal we will always remember. Below is a picture of the glorious meat at the Salt Lick

Now back to the topic of BBQ sauce. John and I immediately loved the Salt Lick BBQ sauce. What was unique about this sauce is that it was a mustard based BBQ sauce as opposed to the tomato based BBQ sauce that we are accustomed to. We happily returned home with bottles of the stuff. As we quickly realized that we couldn’t live without our precious Salt Lick mustard based BBQ sauce, John went in search of a solution.

As the king of internet research, John managed to dig up a recipe for Salt Lick BBQ sauce. The guy who create this thing calls himself a forensic chef, or something like that. He claimed he had already cracked the recipe for Coca Cola and was working on Big Mac Sauce. The document was a novel, going into detail regarding every component of the sauce. With an incredible and detailed list of ingredients, this thing seemed legitimate. If you would like to see the full version click:

http://forum.bigsteelkeg.com

The attached version is my adapted version, for both a single serving and a batch for canning. It also incorporates some of the modifications that John and I made as we created our sauce.

So on complete blind faith into the quality of this recipe, John and I decided to make and can a large batch of this sauce. I think we did the recipe x 12. We embarked on a ridiculous shopping trip, where we were filling our cart with large quantities of items. 2L of mustard. 5 containers of pineapple juice. 5 bottles of apple cider vinegar. Bag upon bag of brown sugar, 4-500mL bottles of Worcestershire sauce (who ever buys 2L of Worcestershire sauce??) and spice after spice after spice after spice.

The next morning, we started our sauce. The recipe begins by directing you to make a sweet and sour sauce first, and then add other ingredients later. We stared with this sauce, combining brown sugar with apple cider vinegar and various spices. We put this sauce aside, to add to the final product later.

We got going on step 2. I felt very strange adding such large quantities of mustard and Worcestershire sauce to the mix, and we definitely second guessed the recipe as we poured bottle after bottle of Worcestershire sauce into the pots. But we kept going.

Now at this point, the air was stinging with acidity, thanks to the Worcestershire sauce, mustard and the apple cider vinegar. We added the appropriate quantity of the sweet and sour dressing to the pots, and decided that we needed to simmer the pots to reduce the acidity. We were a little worried at this point because the sauce was quite pungent. After simmering everything for at least half an hour and adding a little more sugar, we got the sauce down to a lower acidity, just where we liked it.

After we simmered, tweaked and added just the right amount of hot sauce, we began the canning process.

Now one nice outcome that we didn’t anticipate is that the recipe made a little more sweet and sour sauce then was required for our BBQ sauce. We opted to can this sauce as well, and have been using it in stir fries and as marinades since!

TIPS
– The hot sauce asked for by this recipe will be nearly impossible to find. After doing some research on the composition of the hot sauce the recipe asked for, John and I elected to substitute it with another carrot-based hot sauce, Marie Sharp’s. If you can’t find Marie Sharp’s, try using another carrot-based hot sauce such as Melinda’s. If you can’t find a carrot based hot sauce, use your best judgment and select any hot sauce you think might be well suited.
– We made a batch of spicy and a batch of original. Add more hot sauce then the recipe calls for to make the spicier version.
– Simmer you sauce as long as you would like to reduce the acidity. We did find however, that after the sauce cooled and sat, it was less acidic then the day before.
– There are an intimidating and insane amount of spices in this recipe. I pride myself in my spice collection, but we still had to go out a purchase a few new ones for this recipe. If you don’t feel like adding all 8,000 of them, try reducing the number of spices and adding whatever you feel like. When John was camping last June, he made a simplified version of this sauce using a combination of the key ingredients to taste – apple cider vinegar, brown sugar, mustard, Worcestershire sauce – with whatever spices he had on hand. John said it turned out great. This is a great alternative if you don’t want to spend the time to make the more complicated version of the sauce.
– Try just making the sweet and sour sauce, and adding it to a stir fry. We have been doing this – adding some pineapple and sweet and sour sauce to a stir fry is just great.
– A fantastic sauce for basting or dipping!

Now John and I elected to make enough sauce to last the summer and distribute to friends and family. However, you may want to try doing just a single serving of this recipe for one evening instead of canning enough to feed an army as we did. Alter the quantities in the recipe to suit your BBQ sauce needs.

John now uses this sauce to baste almost anything he barbecues. He will go through a whole jar on a brisket, or on a few racks of ribs. We do not use it sparingly! We always have a jar handy for dipping as well whenever we BBQ.

So the sauce turned out great, and our faith in this random internet recipe was justified in the end. We hope that you give this sauce a shot as it greatly enhances many grilled meats. The recipe seems daunting, but you can always try simplifying it in your own way. If you decide to go all out and can a whole batch as we did, let us know, as we would love to try a jar of your take on the Salt Lick BBQ sauce!

If you like this sauce, be sure to check out John’s Smoked BBQ Ribs and Salt Lick Rub.

Bon appetit,

Julie

Click here to view printable Word version of recipe:
Salt Lick BBQ Sauce Recipe

_________________________________________________________

Salt Lick BBQ Sauce Recipe

Yield:

Approx. 2 cups

BBQ SAUCE

Ingredients:

1 cup finished sweet and sour dressing (see below)
1/3 cup prepared mustard
1/3 cup Worcestershire sauce
1 tbsp hot sauce (carrot based preferred) – adjust to taste
1 tsp salt
1/2 tsp fresh cracked black pepper
1/2 tsp cumin
1/2 tsp paprika
1/2 tsp onion powder
1/2 tsp garlic powder
1/2 tsp chinese five spice
1-2 tbsp honey
1-2 tbsp brown sugar
1-2 tbsp white sugar

Directions:

  1. Place sweet and sour dressing, mustard, worchestershire sauce and all spices from salt to chinese five spice in a large pot. Bring to boil. Simmer over medium heat for 30 minutes.
  2. Take off heat and add honey, brown sugar, white sugar and hot sauce. Stir until well incorporated.
  3. Bring to room temperature before use, or pour hot when canning.


SWEET AND SOUR DRESSING

Ingredients: Sweet and Sour Dressing

1/2 cup apple cider vinegar
1/2 cup brown sugar
1/3 cup pineapple juice
1 tsp ginger
1 clove fresh garlic, crushed
1 tbsp corn starch
1 tbsp water
1/4 cup oil

Directions for dressing:

  1. Place all ingredients (except cornstarch, water and oil) into a pan over medium heat. Allow mixture to simmer for 10 minutes.
  2. While simmering, mix cornstarch and water in small bowl, untl cornstarch has disolved.
  3. Add cornstarch mix to simmering pot. Stir. Remove from heat and let sit until room temperature.
  4. Blend dressing while adding drizzle of oil until dressing thickens.

Salt Lick BBQ Sauce Recipe for Canning:

Yield:
5L BBQ Sauce
1L Sweet and Sour Dressing (Left over)

12 cups finished sweet and sour dressing (see below)
4 cups prepared mustard
4 cups Worcestershire sauce
Approx. 12 tbsp carrot based hot sauce – adjust to taste
1/4 cup or 4 tbsp salt
2 tbsp fresh cracked black pepper
2 tbsp cumin
2 tbsp paprika
2 tbsp onion powder
2 tbsp garlic powder
2 tbsp chinese five spice
1 cup honey
1 cup brown sugar
1 cup white sugar

(See directions above)

Sweet and Sour Dressing (for canning)

1.5L or 6 cups apple cider vinegar
1kg or 6 cups brown sugar
1.25L or 5 cups  Dole 100% pineapple juice
3 tsp ginger
3 cloves fresh garlic, crushed
3/4 cup corn starch
3/4 cup water
3 cups oil

(see directions above)

For Dressing:

*Please note: Recipe yields 16 cups, so be sure to remove excess (approx. 4 cups) before adding BBQ sauce ingredients above.

Remember to can excess sweet and sour dressing 


Lecso – Hungarian Pepper Stew

Lesco

Hello everyone,

So when someone asks my Grandpa Joe what his favourite dish is, he never has an answer for you. Growing up poor in Hungry, and being drawn into World War II, food was scarce at times in his life. My Grandpa is not picky, and at the age of 90 is grateful to this day that is he fortunate enough to have food on his plate every day.

But secretly, my family’s best guess is that my grandpa does have a favourite food after all. That would be the Hungarian dish lesco.

Lesco (pronounced letch-o) is a Hungarian pepper stew. The first time I tried it, my mom had invited my grandparents over for dinner. But as a twist, my grandparents decided that they would cook for us. They worked together and brought over a big pot of lesco to serve. And it was delicious!

So I decided I needed to learn how to make lesco myself. For this, my grandma volunteered to come to my house to show me how.

To start, you need to make sure you buy the special Hungarian peppers. These peppers are seasonal and you will only be able to find them in August. This is one of the reasons I am sending this email out today, to give you a chance to locate these peppers to try making your own lesco. I get them at the Italian center. These peppers have a different taste and texture then the regular peppers we buy year round, and they really add something special to the lesco. You can make lesco with any peppers you like, but I’ve only ever made it with the Hungarian peppers. They also come in unusual colours. When I went this week to purchase them, they had them in yellow and purple

You need about 10-15 peppers depending on the size of your pot. I think I used about 12 or so to fill mine. Additionally, you need about ½ the tomatoes that you have peppers. As I bought small roma tomatoes, I probably used about 8 or 9 tomatoes to go with my 12 peppers. There is really no science to this.

Next select your sausage. There is no specific kind of sausage to use. This week, I used a spicy Italian sausage as well as a ham kubasa. I have had lesco with chorizo before as well. Just pick any sausage you like.
Also, add bacon! (this is optional)

So once we had all our ingredients, my grandma and I made lesco together. It is actually a very easy dish, with the vast amount of your total effort required for the chopping part.

In a large pot (I use my cast iron pot) throw in your sausage and cook until edible. I put my raw Italian sausage in first, and the dry kubasa in later. Once the sausage is cooked, add chopped onion, minced garlic and 2 tbsp of paprika, Hungary’s favourite spice. Cook for about 5 minutes, until onion  is tender.  Add your pile of peppers and tomatoes, and a pinch of salt. Mix thoroughly.

This is my lesco before simmering. Don’t worry, it will cook down!

Add your salt to taste, and simmer on low for 20 minutes, or until peppers are cooked to your liking.

It’s that simple.

TIPS:
– Lesco is one of those magical dishes that get better in time. When I made it this week, John and I didn’t even have it for dinner that night, we had it for lunch the next 2 days, and froze some as well!
– Serve with a piece of rye bread with butter. This is classic.

Ingredient I can’t live without:

HUNGARIAN PEPPERS
Such a unique flavour and texture to these yellow peppers, you really have to give them a try!

Spice/herb of the week:

PAPRIKA
A key ingredient to ALL Hungarian cuisine – at the Hungarian cuisine I have experienced!

I had a lovely afternoon making lesco with my grandma that day, and always make a point to make it a few times each summer since I learned how. As the peppers are so seasonal, lesco has become a special summer treat!

So what are you waiting for! Go and grab some of those peppers and try to make some lesco for yourself. As I mentioned, I really wanted to get this edition out before the peppers go out of season!

Bon appetit,

Julie

Click here to view printable Word version of recipe:
Lesco – Hungarian Pepper Stew

__________________________________________________

Lesco – Hungarian Pepper Stew

INGREDIENTS:

Sausage – chorizo, ham, Italian – 2-3 cups, or 3-4 sausages
Bacon (optional)
10 to 15 Hungarian peppers – alternatively any red, yellow or orange peppers in season
Tomatoes – 2 parts pepper to 1 part tomato1
1 onion
2 cloves Garlic
2 tbsp Hungarian paprika
DIRECTION:

  1. Saute sausage in oil.
    When meat is ready to eat, add garlic , onions and paprika.
    Cook 5 minutes to soften onion
  2. Add peppers and tomatoes
    Turn from the bottom so flavours combine.
    Simmer for 20 minutes until peppers are tender.
    Add salt and pepper to taste

Chopped Kale Salad with Barley or Quinoa

Kale Salad

Hello everyone,

These days it’s all about fad foods. In 2012 it was quinoa, in 2013 it was kale. This year it is cauliflower (at least according to my own observations.) Apparently, carbs are making everyone fat so people are now replacing carbs with various forms of cauliflower. Cauliflower mashed potatoes. Cauliflower Kraft Dinner. I recall John and I seeing a `cauliflower ricer` somewhere. I am far too lazy to rice cauliflower, and I am sure John would wither away if I started replacing carbs with vegetables. As an alternative to carb replacement, I prefer to practice portion control!

As usual, I am behind the trends, so this email will be all about kale!

According to my research ie Wikipedia, kale is high in vitamin K, vitamin C, beta cerotene (whatever that is) and “rich” in calcium. Not sure what the difference between rich in calcium and high in calcium is, but Wikipedia says rich. It is apparently a source of two carotenoids, lutein (at least I know what lutein is, good for your eyes!) and zeaxathin. Like broccoli, kale is a brassica, which contains sulforaphan, a chimical with anti-cancer properties. My appologies to Nellie, a recipient of this email and registered dietician who is probably cringing at this paragraph.

Ok, now that I am done plagiarizing Wikipedia, let’s contine.

So despite the fact that you may be starting to crave this carotenoid high, calcium rich, zeacathin loaded, sulforaphan heavy brassica, there is something that is plainly obvious about kale, but no one really wants to admit it. The problem with kale is that it actually tastes terrible. Cat’s out of the bag. Go chow down on a raw piece, and I’m certain your dining experience will be rather unpleasant. As a result, the key is to mask the flavour. Steamed kale is not bad, and always a good option. I’ve juiced kale, and just a little bit always ruins the taste of the entire juice. But as many of us are in pursuit good health, we are willing to try and test ways to make kale palletable, myself included. I enjoy making kale chips. Try tossing your kale in olive oil with salt and pepper, roast your kale in the oven at 350 degrees for about 10 minutes or more. The salt covers up the taste of the kale marvelously. John even ate some the other day!

So I never even considered putting kale raw in a salad, until one day Jackie brought a kale salad over to my place with a strong mustard based dressing. As I couldn`t taste the kale due to the strong dressing, it was actually quite delicious! Shortly after, my Grandma (who has been bucking processed food trends since the 1950`s) discovered Costco’s critically acclaimed (at least it should be) kale salad, featuring all kinds of weird things I would never eat on their own … kale, chickory (is that how you spell it?) and raw brussel sprouts among other things. But this salad is delicious (thanks to a wonderful, sweet creamy dressing.) My family has enjoyed this salad at many gatherings at the lake. So my eureka moment: if you can’t taste the kale, then kale tastes good!

So in pursuit of masking the taste of kale, this week`s recipe is a tasty quinoa kale salad! (Okay, so I exaggerated, kale is one of many ingredients, but it is in there.) My mom and I were at the Enjoy Center, and we had a kale salad. It was very enjoyable, and I took it upon myself to try to replicate it at home. This recipe is what I came up with!
TIPS:
– The attached recipe is good to serve one person as a lunch salad. If you are a light eater, this should get you through the afternoon, but for me I usually supplement it with a side of chicken or cottage cheese. Will serve 2-3 as a dinner salad.
– Try using any grain you like. My personal preferance is to use barley, but rice, quinoa, anything will do (you can even try ricing cauliflower, which will render this recipe fad-foodalicious! Kale + Quinoa + Cauliflower = So healthy I can`t even stand it anymore!)
– I`ve made various alterations: with and without the mint, adding seeds or nuts, with or without green onion, with or without parsley, with or without the red cabbage etc. I added cucumber to the one I made featured in the picture.

Ingredient I CAN live without:

KALE
Like I said, it`s not that good. Just really healthy.

Spice/herb of the week:

FRESH DILL
Love it in salads, also often a key ingredient when John and I do carrots or potatoes in foil.

John and I purchased and have nearly polished off a 1kg package of Cadbury Mini Eggs from Costco, coupled with more chocolate from various egg hunts over the weekend. As you can probably imagine, this has been delicious but disastrous. I thought the time had come to offer up a really healthy salad. Maybe it can undo some of the damage I have inflicted on my pancreas this week. As you recover from a weekend of chocolate and Easter meals, I hope this will help you too!

Bon Appetit,

Julie

P.S. If you own a cauliflower ricer, I’m sorry if I offended you.

Click here to view printable Word version of recipe:
Kale Barley-Quinoa Salad

_____________________________________________________________

Kale Barley/Quinoa Salad

Serves 1 for a meal, 2 as a side

1/2 cup quinoa or barley

2 leafs Kale, finely chopped
2 leafs Lettuce, chopped in strips  – leafy green or romaine
1/2 cup red cabbage, shredded
1/2 a tomato finely chopped
1 carrot, grated
Dill
Parsley
Less than 1 tbsp fresh Mint, minced (optional)
Garnish with green onions
Sprinkle with sunflower seeds

DRESSING
1 tbsp Lemon Juice
1 tbsp Olive oil
1 tbsp Soya Sauce

Tilapia with Zucchini Tomato Medley

Zucchini

Hello everyone,

So something strange has happened to my garden. It seems as though some garden gnomes have had some sort of nuclear melt-down in their miniature power plant, a power plant that happens to be located in my garden, somewhere between the zucchini and squash plant. As a result, my garden overgrown and already producing In the middle of July.

In my limited gardening experience, my gardens have never really started producing until August. So John and I were quite surprised to pull out a pair of zucchinis that completely dwarf my biceps just yesterday.

Pictured below is my garden. To my right at the back is the freakishly large zucchini plant, a plant that was mistook for rhubarb weeks ago. You may also be able to spot the squash plant creeping its way across the lawn. At the front right is a tomatillo plant. You can see the little green orbs that are empty today, but should fill with tomatillo over time. At the back, you can see a solid wall of tomatoes, already producing some little green specimens. You can probably even spot a little greenish-yellow gypsy on the left.

So at this early stage in July, my garden has run out of room to grow already, and I’m not sure what can be done. The climbing tomatoes have reached the top of my lattice. The squash has made its way on to the lawn, and I have had to constantly hack leaves off of the zucchini plant to keep it from taking over my precious peppers and beat – it has already taken my tiny tim tomato plant as its first casualty!

So the secret? Well I have to credit some good suggestions from a few people as well as some nice weather and a little persistence on my and John’s part. I think this year has created a perfect garden storm. My Grandma told me a while back that there is good soil in St. Albert … well I guess she was right! She also brought over a pile of manure compost from the university farm. John added a layer of sea soil, as suggested by his parents. Add in a south facing yard, 4 weeks of scorching weather, watering almost every night, and my dirty little secret (Miracle Grow) and POOF! Garden explodes.

So as you can probably guess from the picture above, I already have more zucchini then I know what to do with. Apart from grilling zucchini with John and the odd dish, I know very few zucchini recipes. So, I am turning to John’s mom Lily for some expert advice. She said she used to have quite the garden, and it is becoming apparent to me that she knows how to use zucchini. She has already made a few suggestions including baking with zucchini and buying one of those vegetable spaghetti makers to make your own zucchini spaghetti (I think this is a great idea and will be on my way to Bed Bath and Beyond to purchase a Veghetti once my 20% off coupon arrives in the mail!) Lily often makes her much-loved zucchini muffins for her family, and ever so often will surprise everyone with some to take home to be carefully savored or quickly demolished. John has also told me of a delicious zucchini stir fry she invented featuring beef bouillon of all things… perhaps we will have to try this too!  I have a feeling this zucchini saga will be ongoing all summer, and I plan to keep you all updated! Aren’t zucchinis interesting?!

In the meantime, today’s recipe of the week won’t come close to using up a zucchini the size of those monsters above, but will use a little bit anyways. I have to give my Mom credit for this one, as she has been making it regularly for a while now. This recipe is tilapia topped with a zucchini tomato medley. It is very quick and very simple and easy to make on the go, especially since fish can thaw so quickly.

1. Fry the tilapia until it Is cooked, 4-5 minutes on each side. Alternatively, try using any white fish you like.
2. Remove fish from pan. Add oil if needed. Saute garlic and onions.
3. Once onions start to become tender, add chopped zucchini and tomato. Cook for a quick minute. Add capers (optional)
4. Add salt, pepper and a splash of white wine and some fresh or dried basil. Cook until wine reduces.
5. To serve, place fish on plate and top with vegetable mix.

Ingredient I can’t live without:

ZUCCHINI
Grilled, stir fried, even fresh, zucchinis are easy as pie to grow in Northern Alberta

My apologies for no food photo this week, as I pulled this recipe off the top of my head as I wanted something for zucchini. But I assure you, it is a nice light recipe, especially appropriate for these scorching summer days!

Bon appetit!

Julie

Click here to view printable version of recipe:
Tilapia with Tomato Zucchini Medley

_________________________________________________

Tilapia with Tomato Zucchini Medley

INGREDIENTS:

Tilapia, or any white fish you desire
Oil
½ onion
1-2 cloves garlic
1 tomato, chopped
1 small zuccnini, chopped
salt and pepper
Capers (optional)
White wine or lemon juice
Basil, fresh or dried

DIRECTIONS:

  1. Fry the tilapia until it Is cooked, 4-5 minutes on each side. Alternatively, try using any white fish you like.
    2. Remove fish from pan. Add oil needed. Saute garlic and onions.
    3. Once onions start to become tender, add chopped zucchini and tomato. Cook for a quick minute. Add capers (optional)
    4. Add salt, pepper and a splash of white wine/lemon juice and some fresh or dried basil. Cook until wine reduces.
    5. To serve, place fish on plate and top with vegetable mix.